Recurring, multi-step processes—like lead conversion, content approval pipelines, or project task reminders—often involve tedious manual work: copying, pasting, switching between apps, and sending notifications. The Button field is designed to eliminate this friction. Think of it as a “smart remote” for each row of your data, allowing you to trigger complex, pre-configured workflows with a single click.Documentation Index
Fetch the complete documentation index at: https://help.teable.ai/llms.txt
Use this file to discover all available pages before exploring further.
This guide will walk you through two key areas:
- What can the Button field do?—Unlock its full potential.
- How do you use it?—A step-by-step guide to configuring your first automation button.
What Can You Do With It?
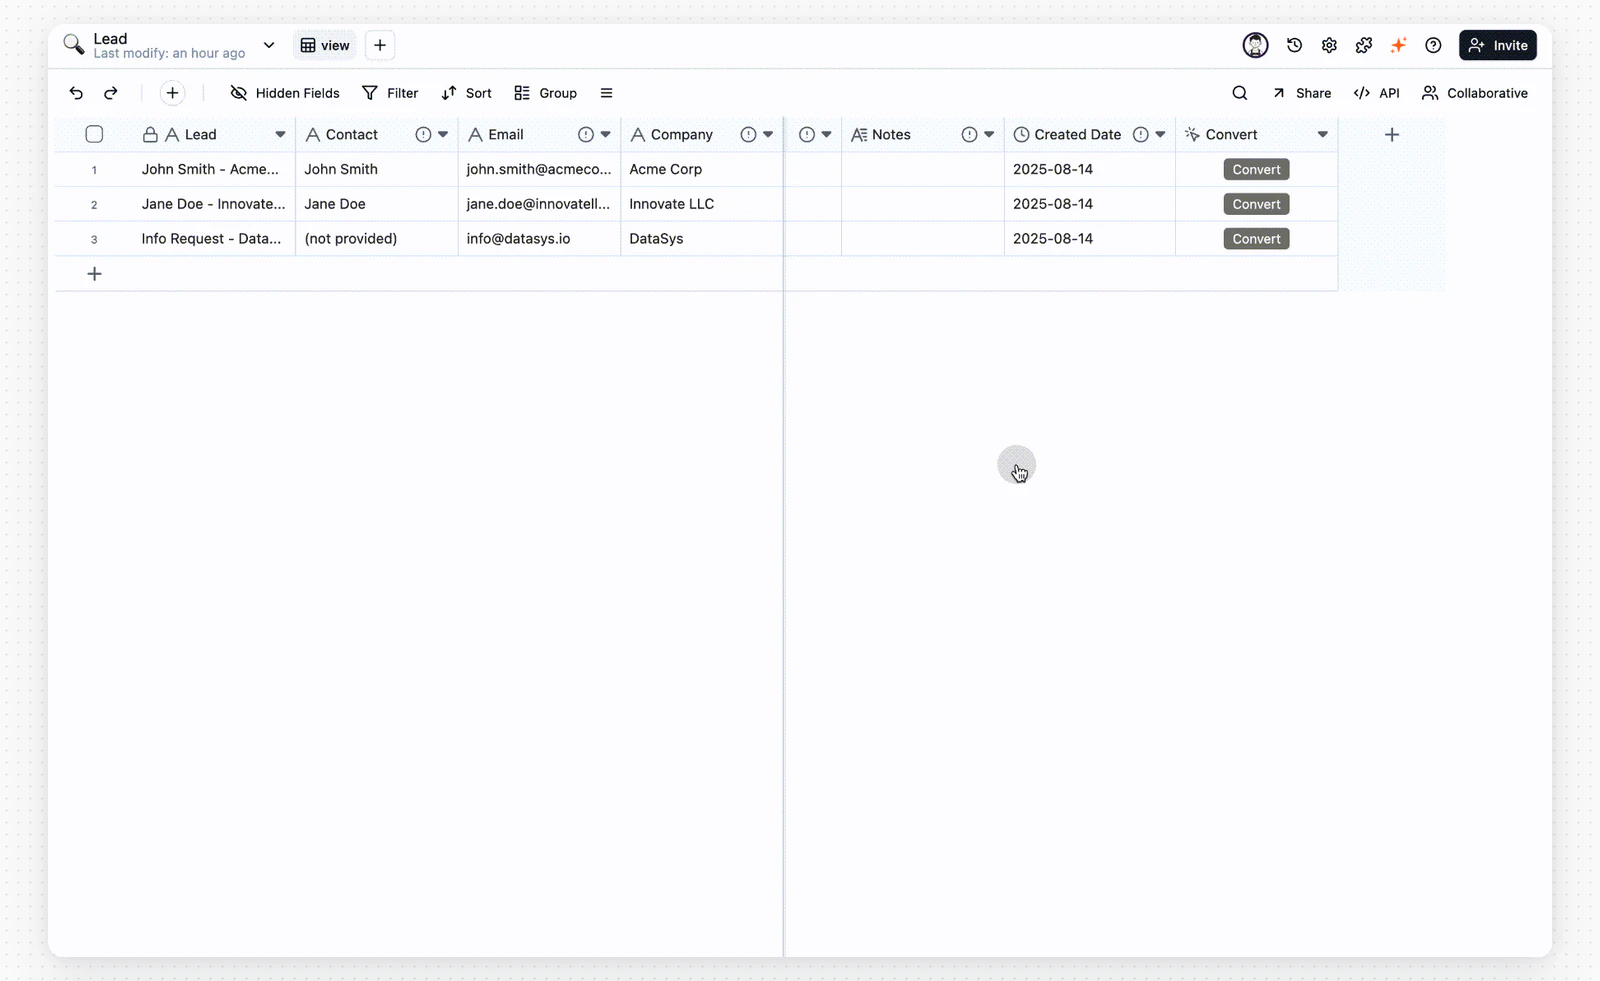
The core value of the Button field lies in its ability to connect and execute. It can link data within your tables and integrate with external systems, bundling a series of actions into a single click.Use Case 1: One-Click Lead Conversion
In a CRM, when a sales representative identifies a mature lead, they can simply click a “Convert to Opportunity” button. The automation instantly creates a new record in the “Opportunities Table,” populates it with all the key information from the lead, and updates the original lead’s status to “Converted.”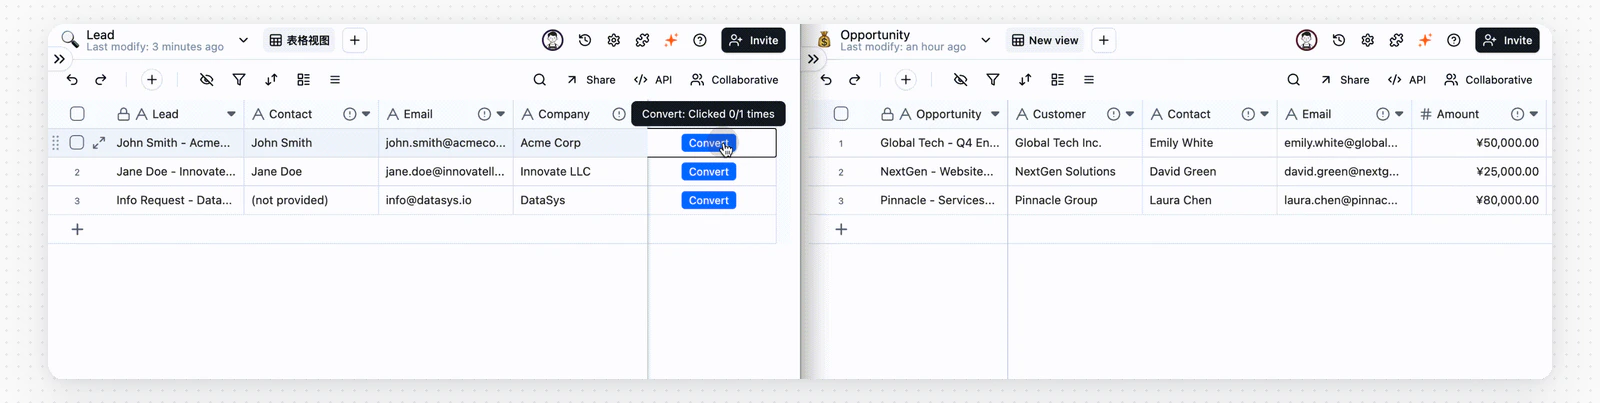
Use Case 2: One-Click Content Scheduling
Once a content draft is approved, an editor clicks the “Schedule for Publication” button. The system automatically creates a new post entry in the “Social Media Schedule Table” and sends an email notification to the social media manager: “A new draft [xxx] is ready for scheduling.”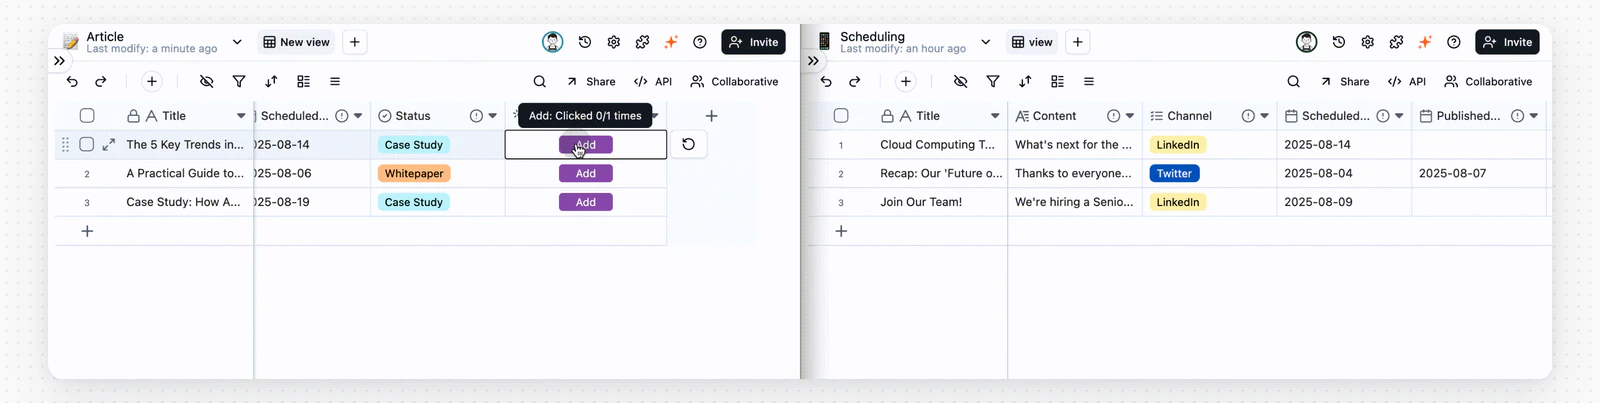

Use Case 3: One-Click Task Reminders
When a project task is nearing its deadline but remains incomplete, the project manager clicks the “Send Reminder” button. The system immediately sends a notification via your team’s preferred communication tool (e.g., Slack, Teams, Email): “[Task Reminder] The task ‘XXX’ assigned to you is due soon. Please prioritize its completion!” This seamlessly integrates your data table with your team’s communication workflow.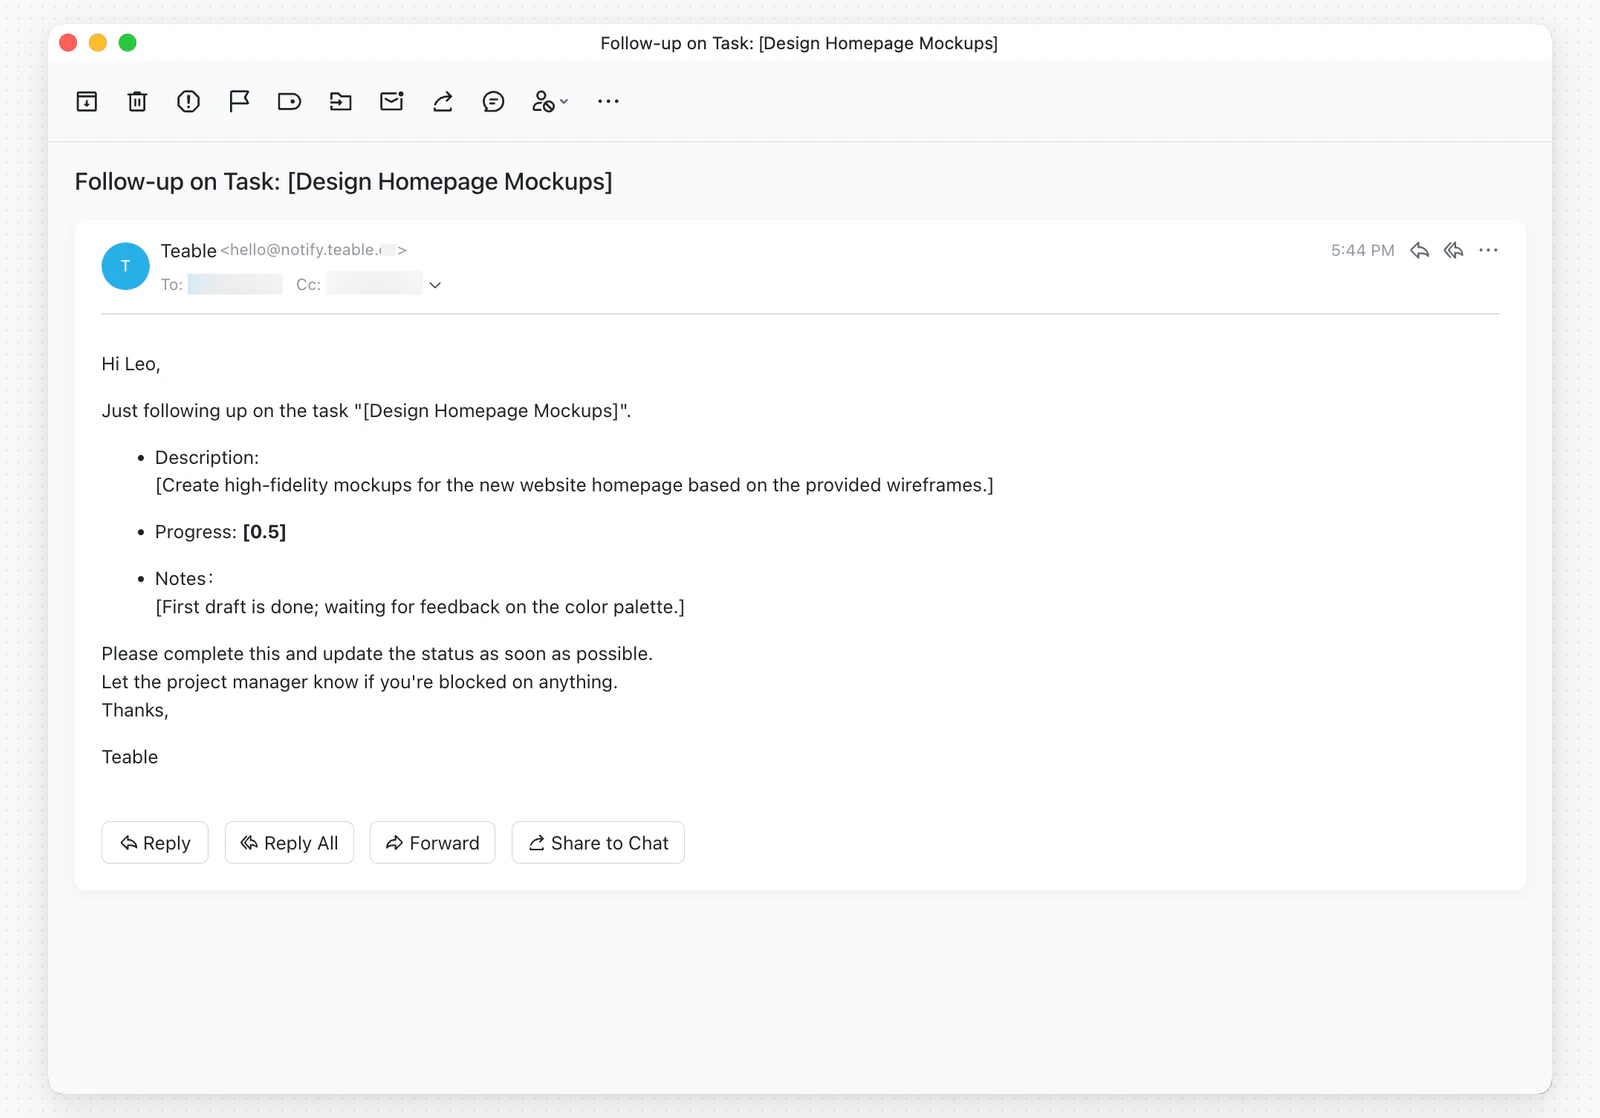
How to Set It Up
Let’s walk through the classic “One-Click Lead Conversion” example to see how to configure a button. First, you’ll need two tables: a “Leads Table” and an “Opportunities Table”.Step 1: Create the Button Field
In your “Leads Table,” add a new field with the following settings:- Field Type: Choose “Button”.
- Button Label: Enter “Convert” and pick a distinct color, like blue.
-
Confirm Before Click (Optional): If this step should not be triggered by mistake, turn on the confirmation dialog and fill in the title, content, and confirm-button text.

Step 2: Custom the Automation Workflow
- Click “Custom automation”
-
Configure Actions: Define what happens when the button is clicked.
- Action 1: Create a new record in the “Opportunities Table”
- Action Type: Select “Create Record”.
- Target Table: Choose the “Opportunities Table”.
- Field Mapping: This is the most critical part, where you pass data from the lead to the new opportunity.
Opportunity Namefield =Company Namefrom the triggering record.Related Contactfield =Contact Namefrom the triggering record.- … (map other relevant fields).
- Action 2: Update the current lead’s status
- Add a second action of type “Update Record”.
- Target Table: “Leads Table”.
- Record ID: Select the ID “from the record that triggered the workflow”.
- Field to Update: Set the
Statusfield to “Converted”.
- Action 1: Create a new record in the “Opportunities Table”
In the “Actions” step, you can add even more powerful integrations.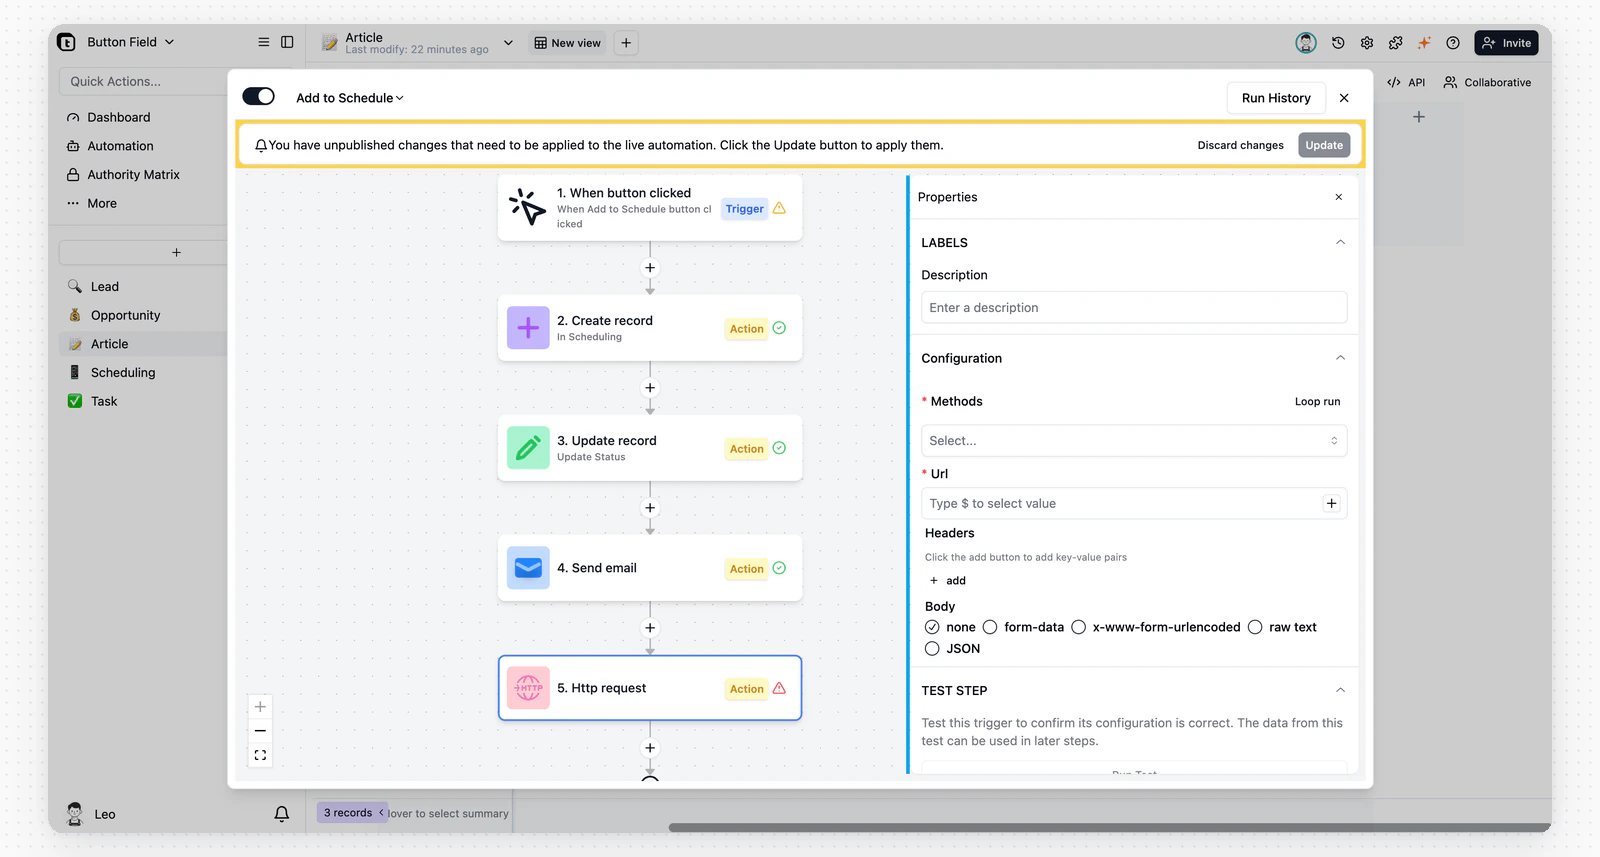
Send an Email
To notify a sales director of a new conversion, add a “Send Email” action. You can configure:- Recipient: Use a static email address or dynamically pull from a “User” field.
- Subject/Body: Insert dynamic values from the triggering record.
Example: “New Opportunity: [Company Name] was converted by [Owner].”
Example of a task reminder email.
Make an HTTP Request
This advanced feature lets you communicate with any external system via API. For instance, you could sync a new customer’s details to a separate accounting software.Advanced Feature: Precise Control with Limit Clicks
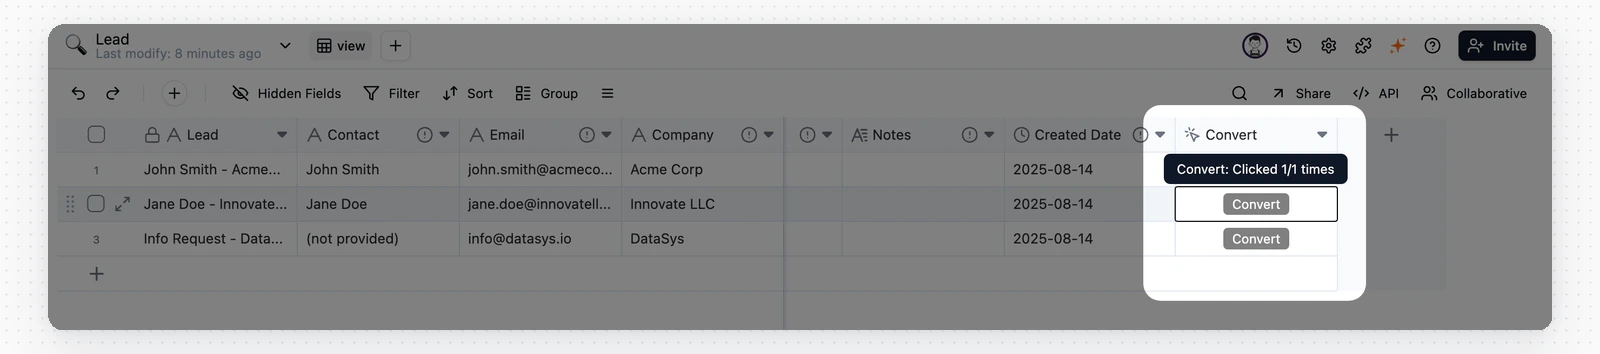
The Button field settings include two powerful options: “Max Clicks” and “Allow Reset”.Feature Breakdown
- Max Clicks: Sets a maximum number of times the button can be clicked for each individual record. The button becomes disabled once the limit is reached.
- Allow Reset: Allows a user to manually reset the click count, re-enabling a disabled button.
Use Case: Preventing Duplicate Lead Conversions
This simple setting is crucial for maintaining data integrity. By setting the maximum clicks to
1, you ensure a lead can only be converted into one opportunity, eliminating the risk of duplicate records from accidental double-clicks.- Max Clicks: Set to
1. - Allow Reset: Keep this option disabled.