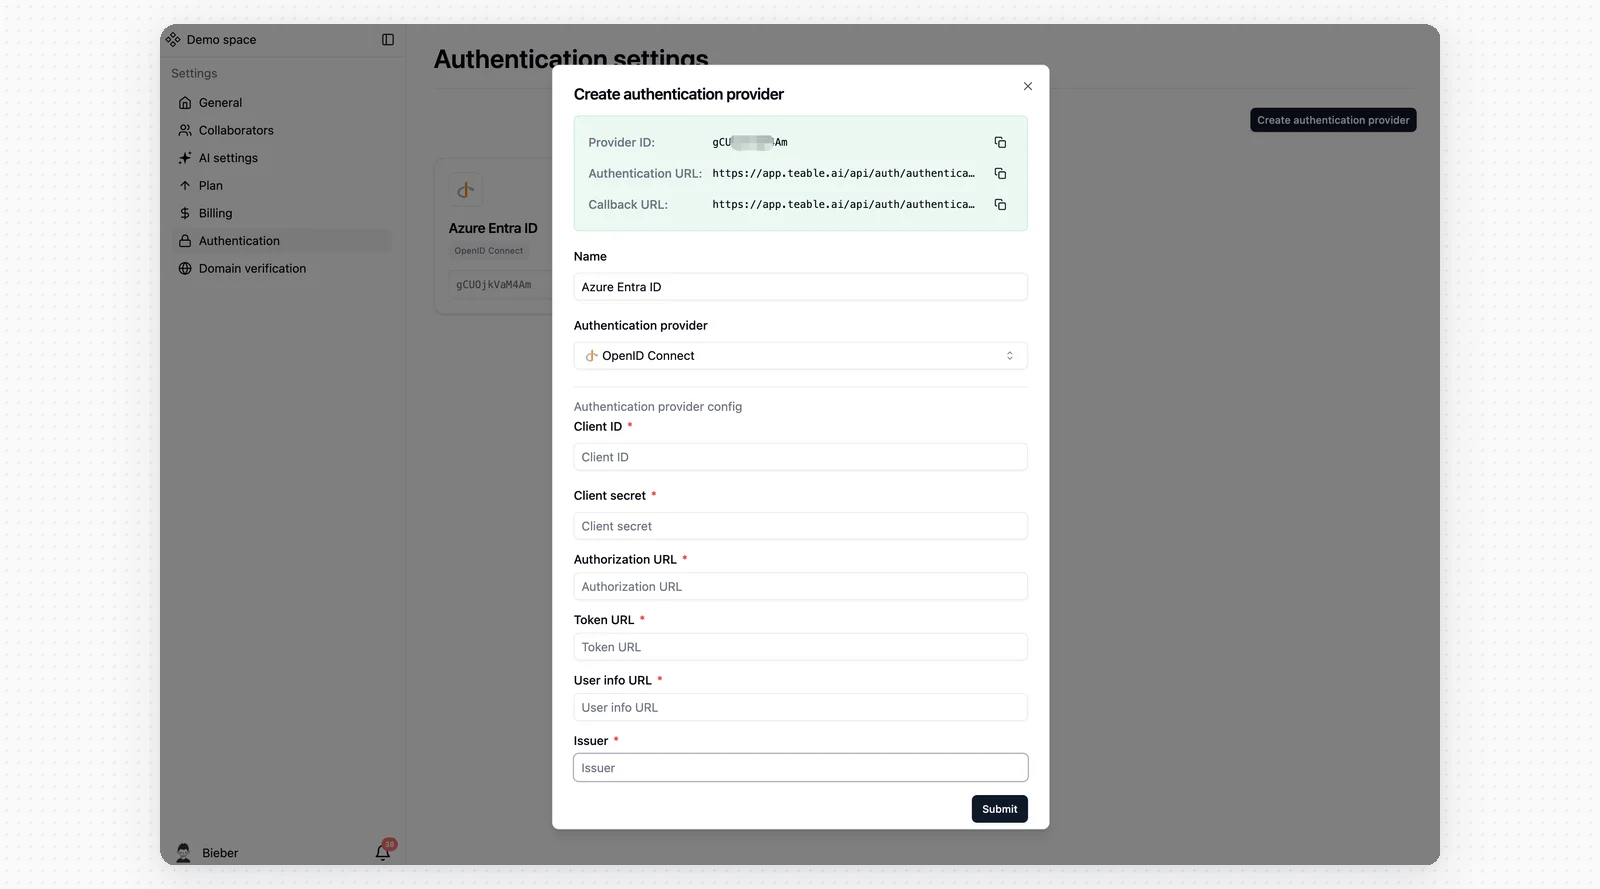
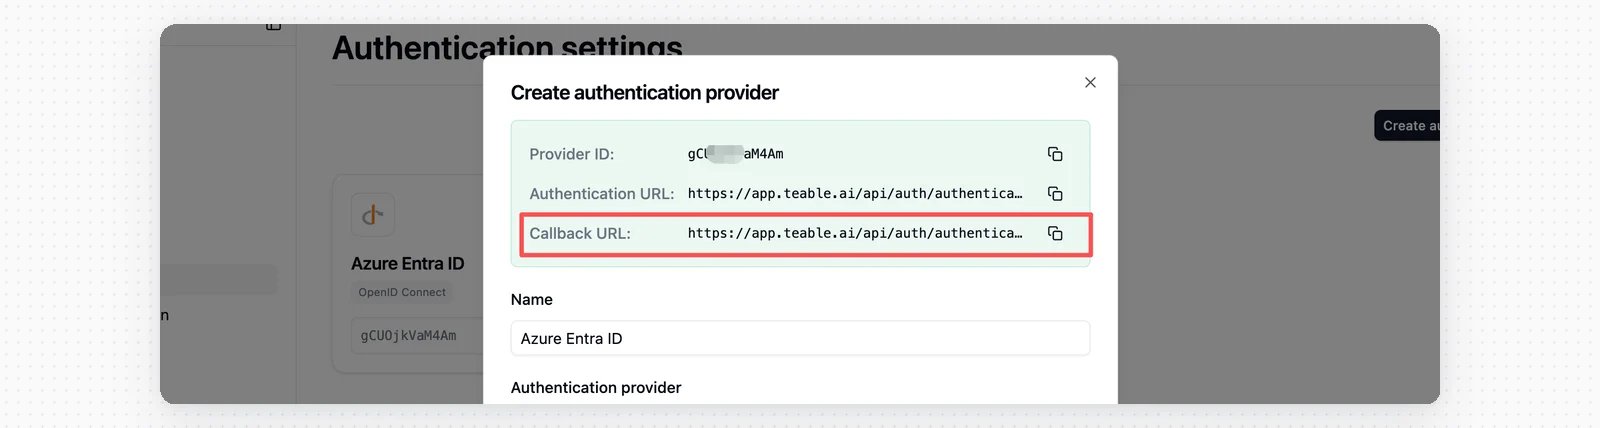
Step 1: Create Authentication Provider in Teable
- Navigate to your Teable SSO settings
- Create a new authentication provider and name it Azure Entra ID and select OpenID Connect
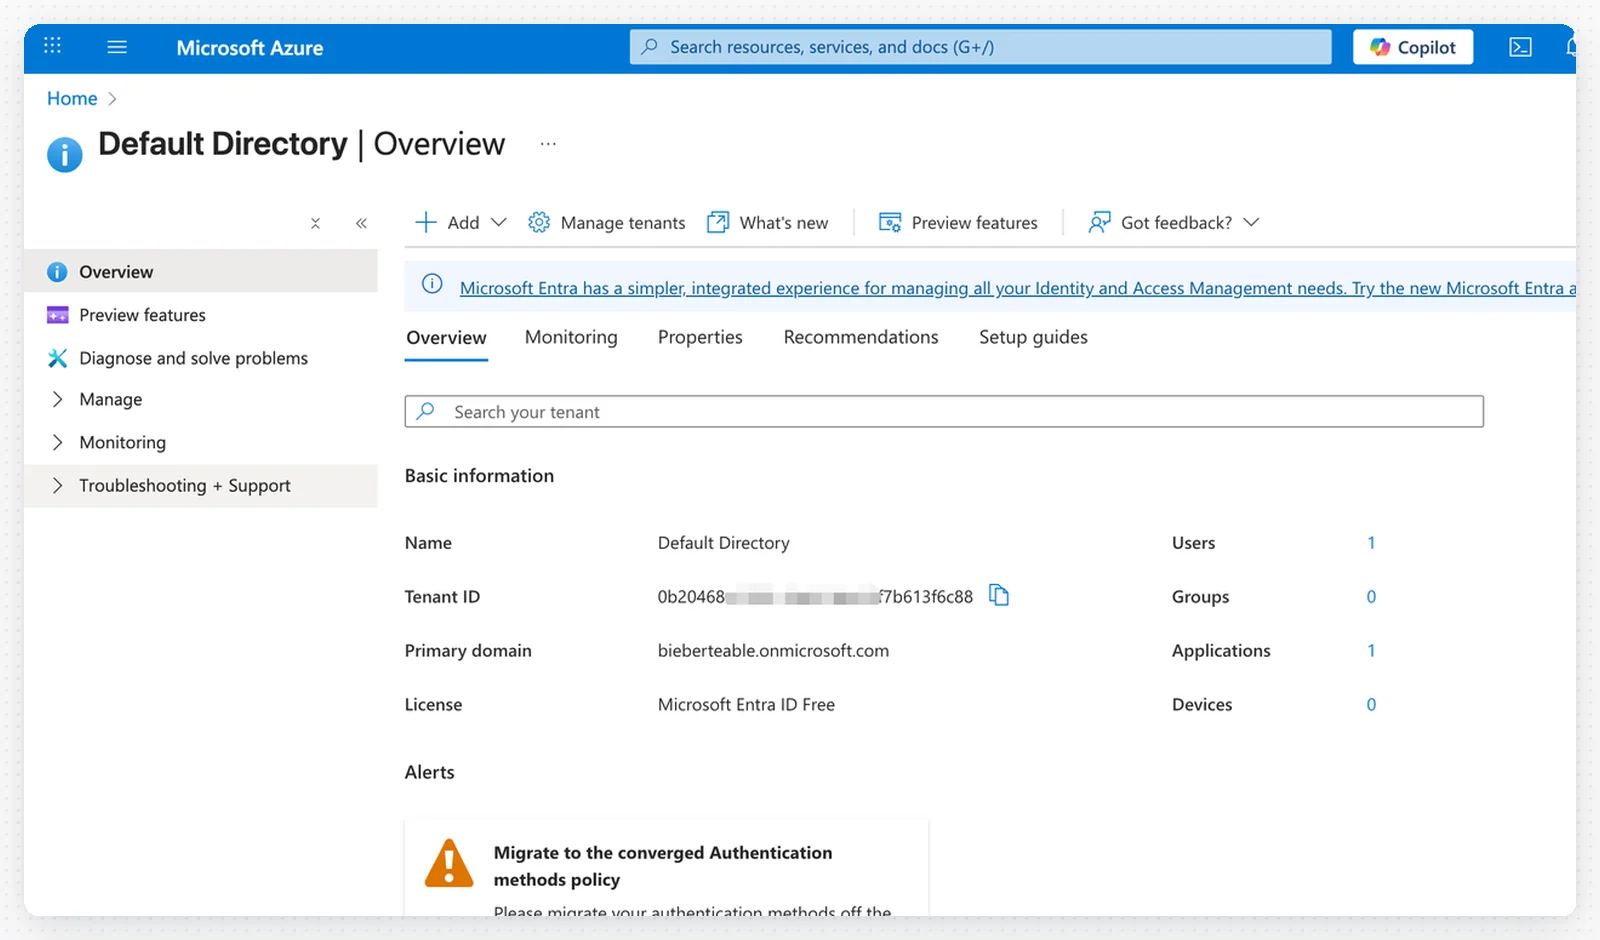
Step 2: Access Azure Entra ID
- Log in to your Azure account
- Navigate to Microsoft Entra ID (formerly Azure Active Directory)
Step 3: Configure OAuth Endpoints
Fill in the following OAuth endpoints in Teable using your Tenant ID: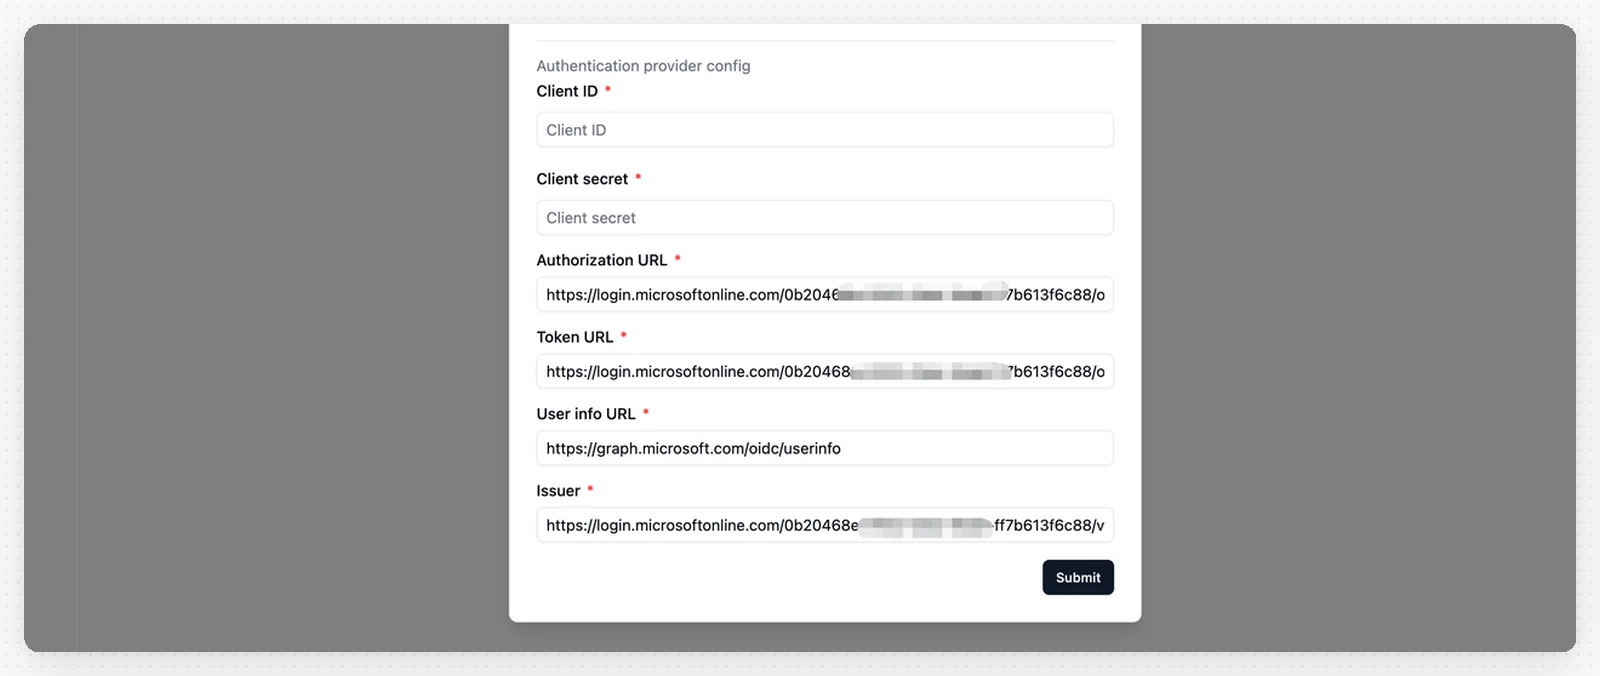
- Authorization URL:
https://login.microsoftonline.com/_YOUR_TENANT_ID_/oauth2/v2.0/authorize - Token URL:
https://login.microsoftonline.com/_YOUR_TENANT_ID_/oauth2/v2.0/token - User Info URL:
https://graph.microsoft.com/oidc/userinfo - Issuer:
https://login.microsoftonline.com/_YOUR_TENANT_ID_/v2.0
Replace
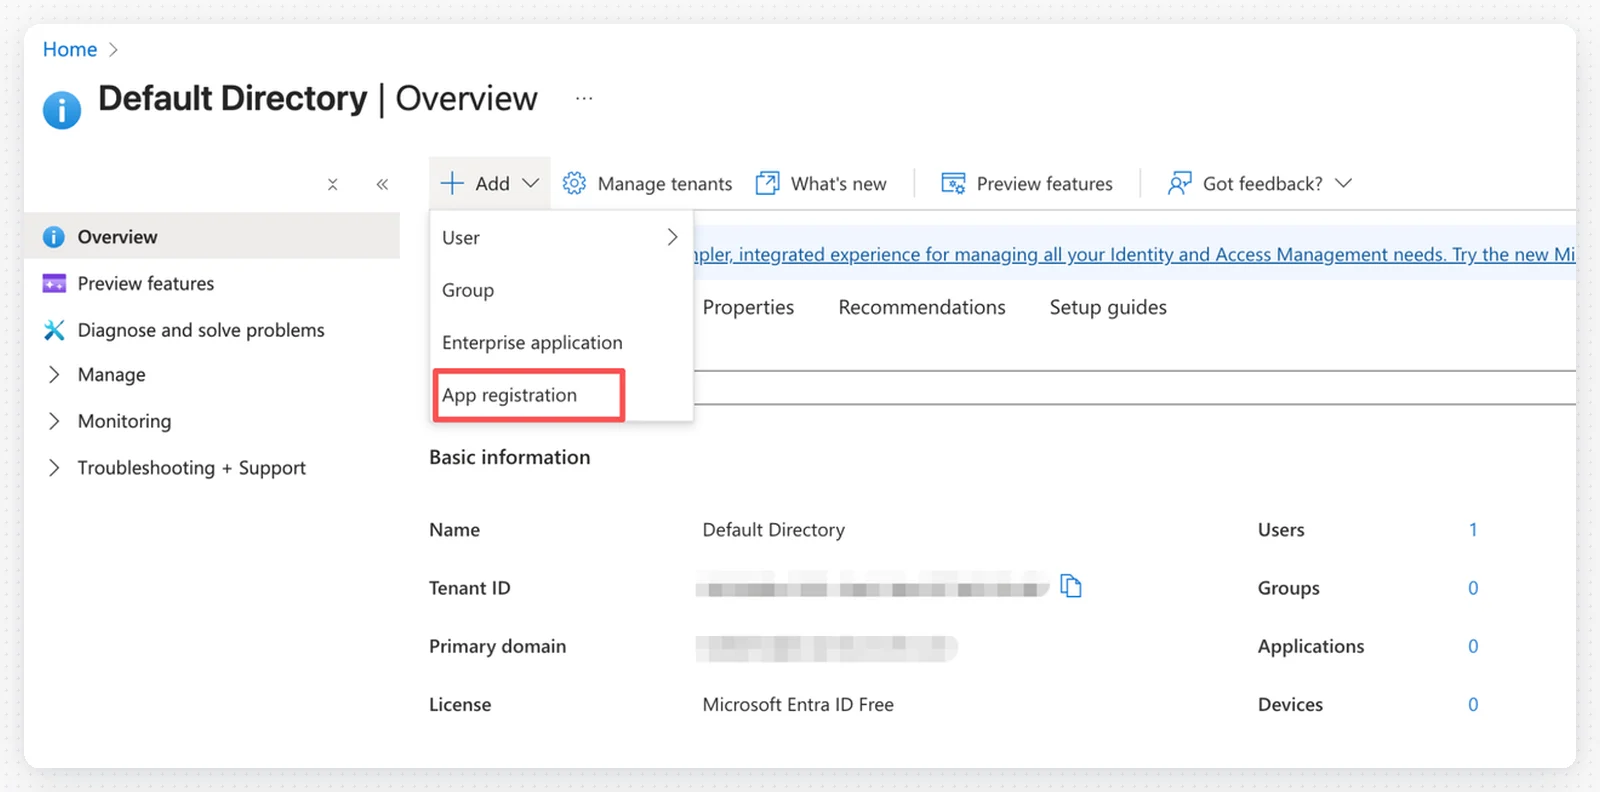
_YOUR_TENANT_ID_ with your actual Azure Tenant ID.Step 4: Register a New Application
- In Azure Entra ID, click App registrations in the left menu
- Click + New registration
Step 5: Configure Application Registration
Fill in the application registration form: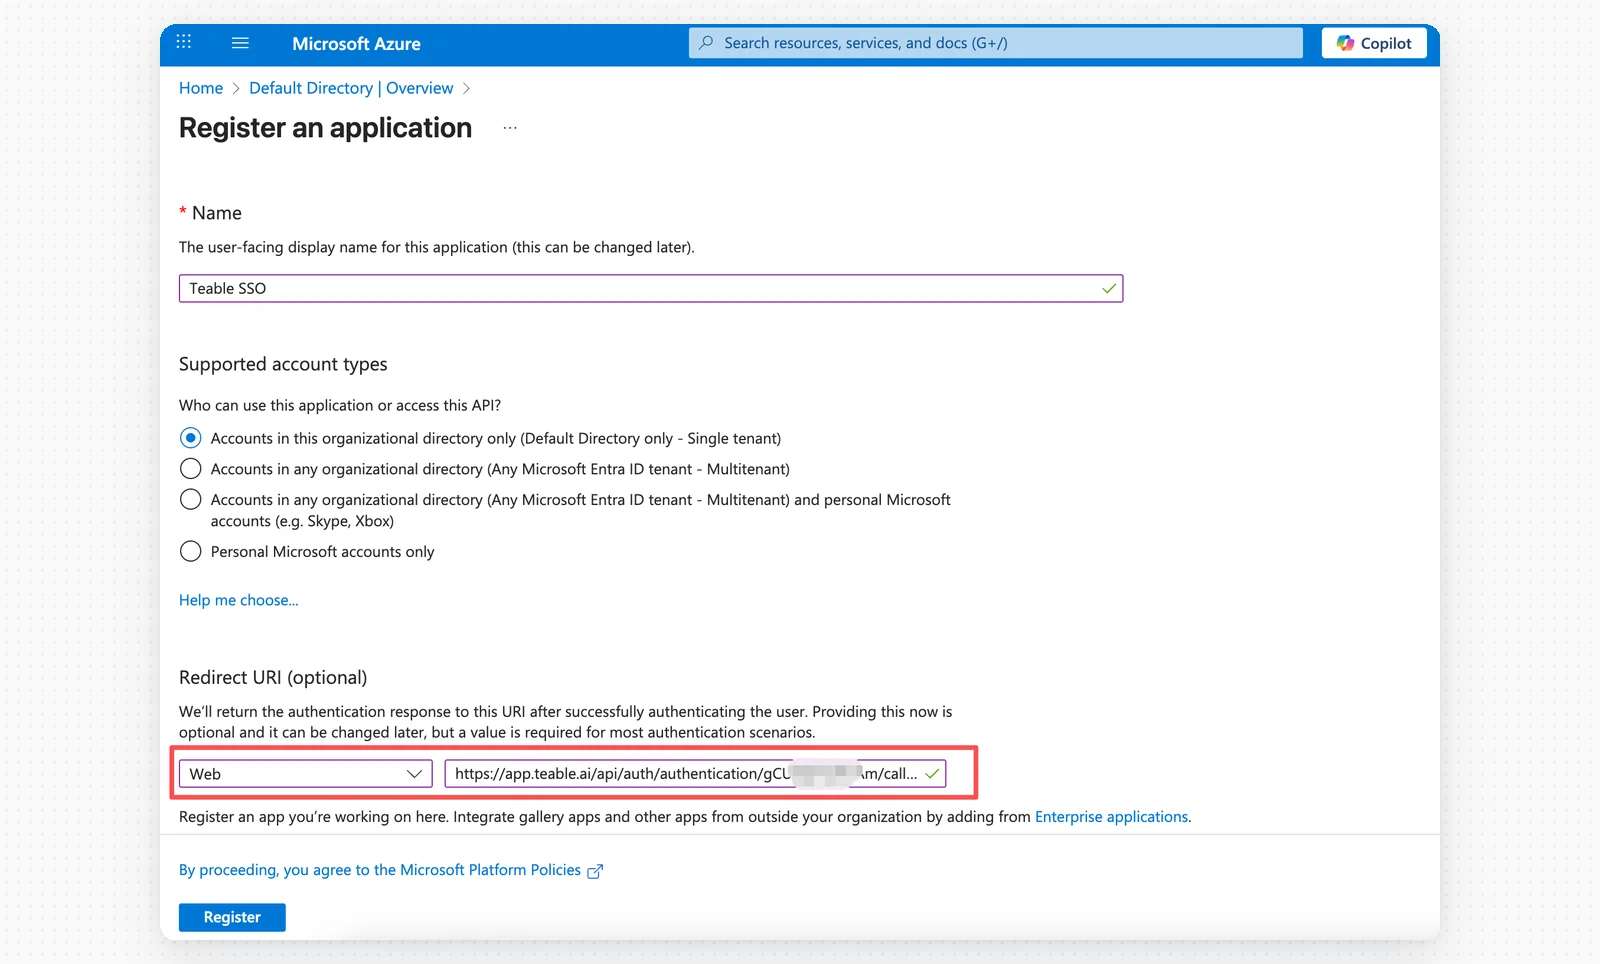
- Name: Teable SSO
- Supported account types: Select based on your needs
- Platform: Web
- Redirect URI: Paste the Callback URL from Teable
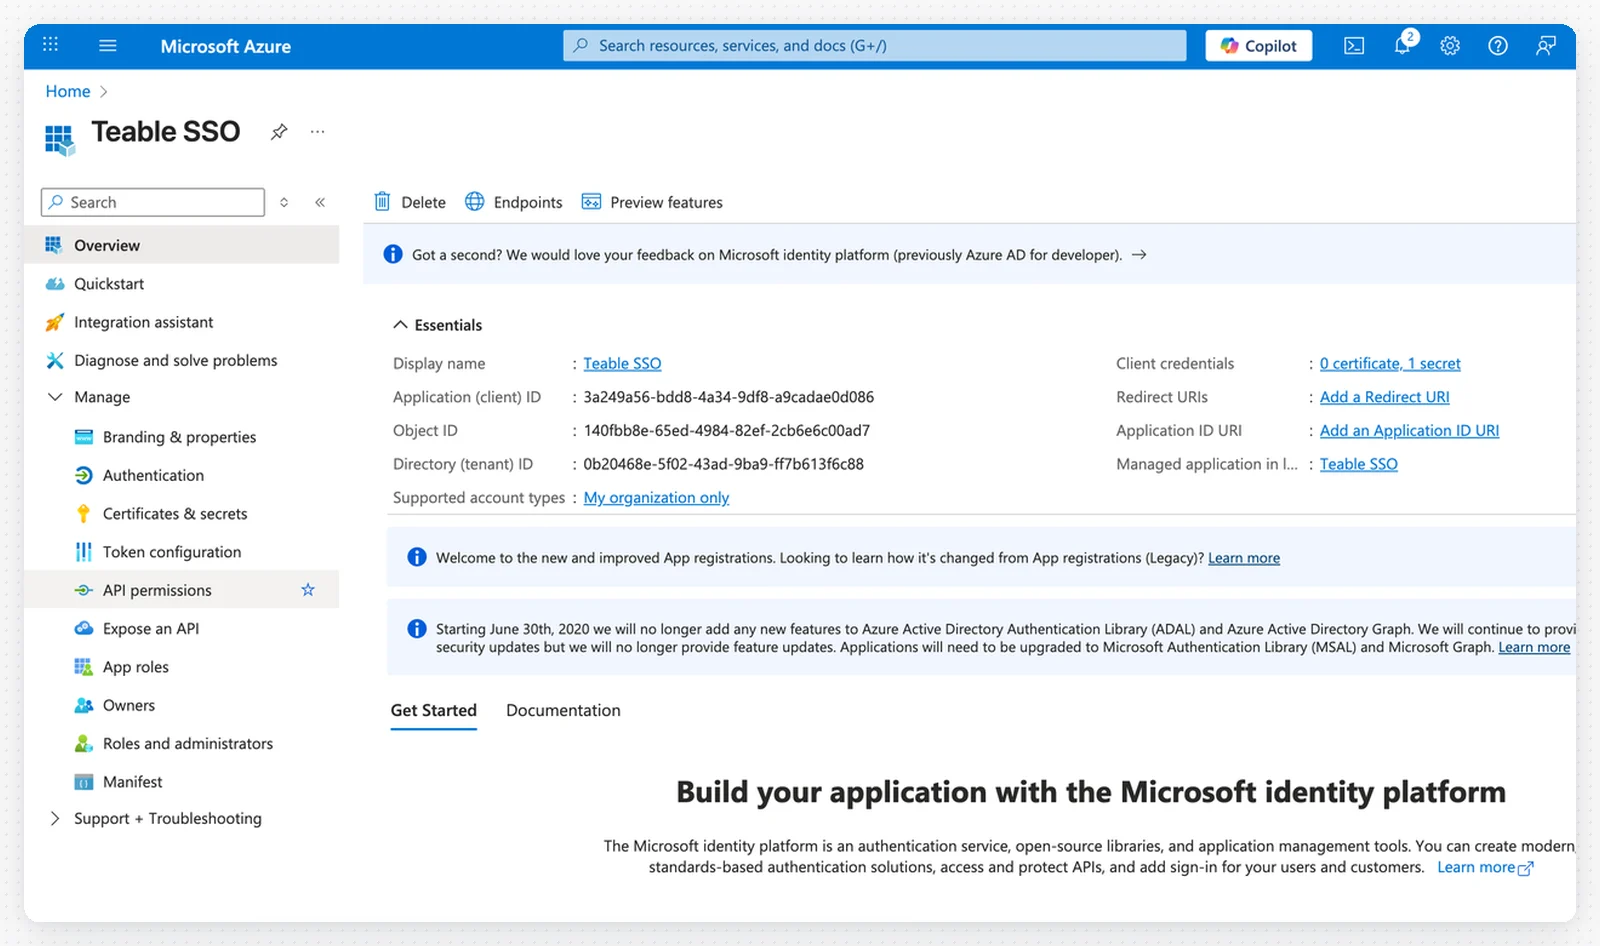
Step 6: Save the Client ID
- Copy the Application (client) ID from the application overview page
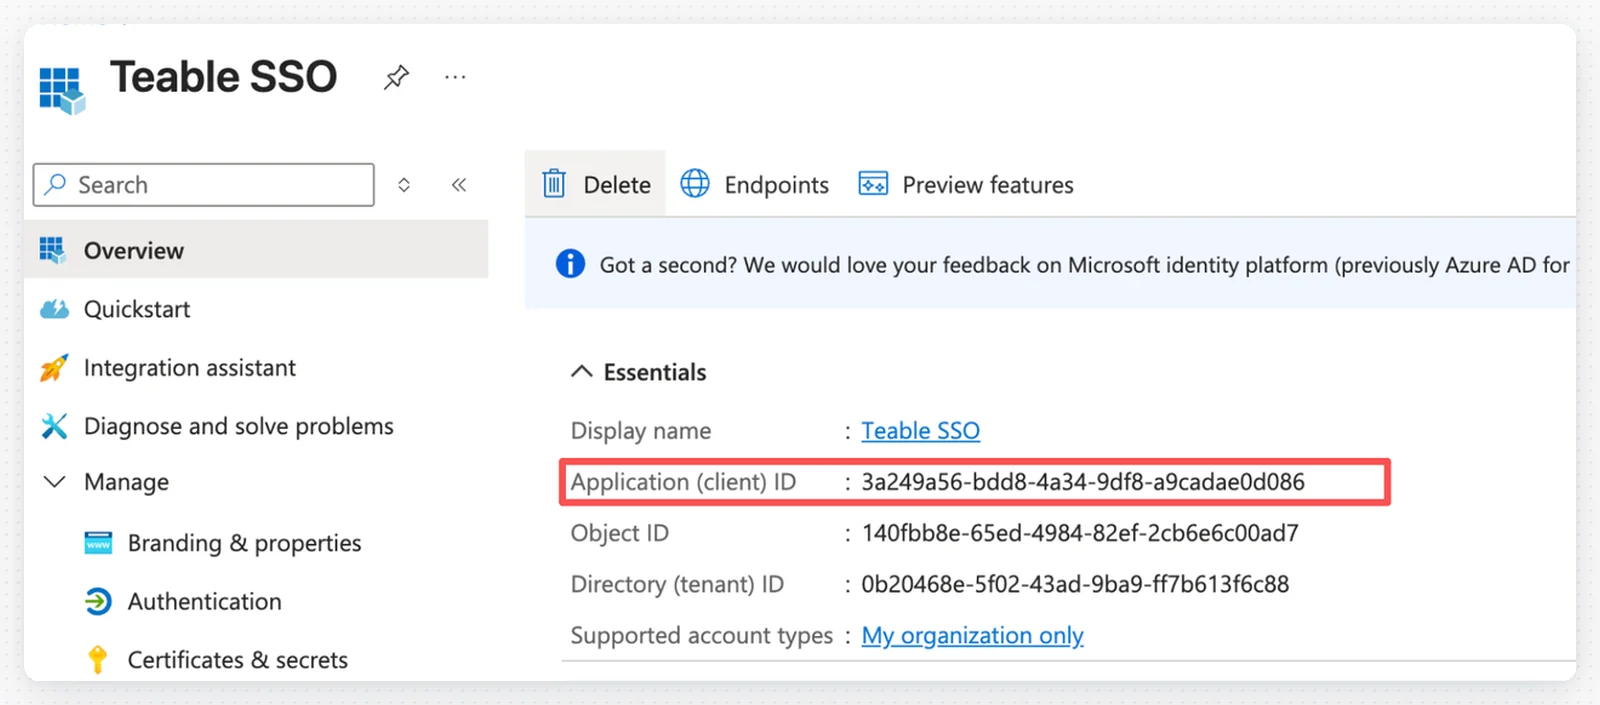
- Paste the Client ID into the Teable SSO configuration

Step 7: Create Client Secret
- In your application, click Certificates & secrets in the left menu
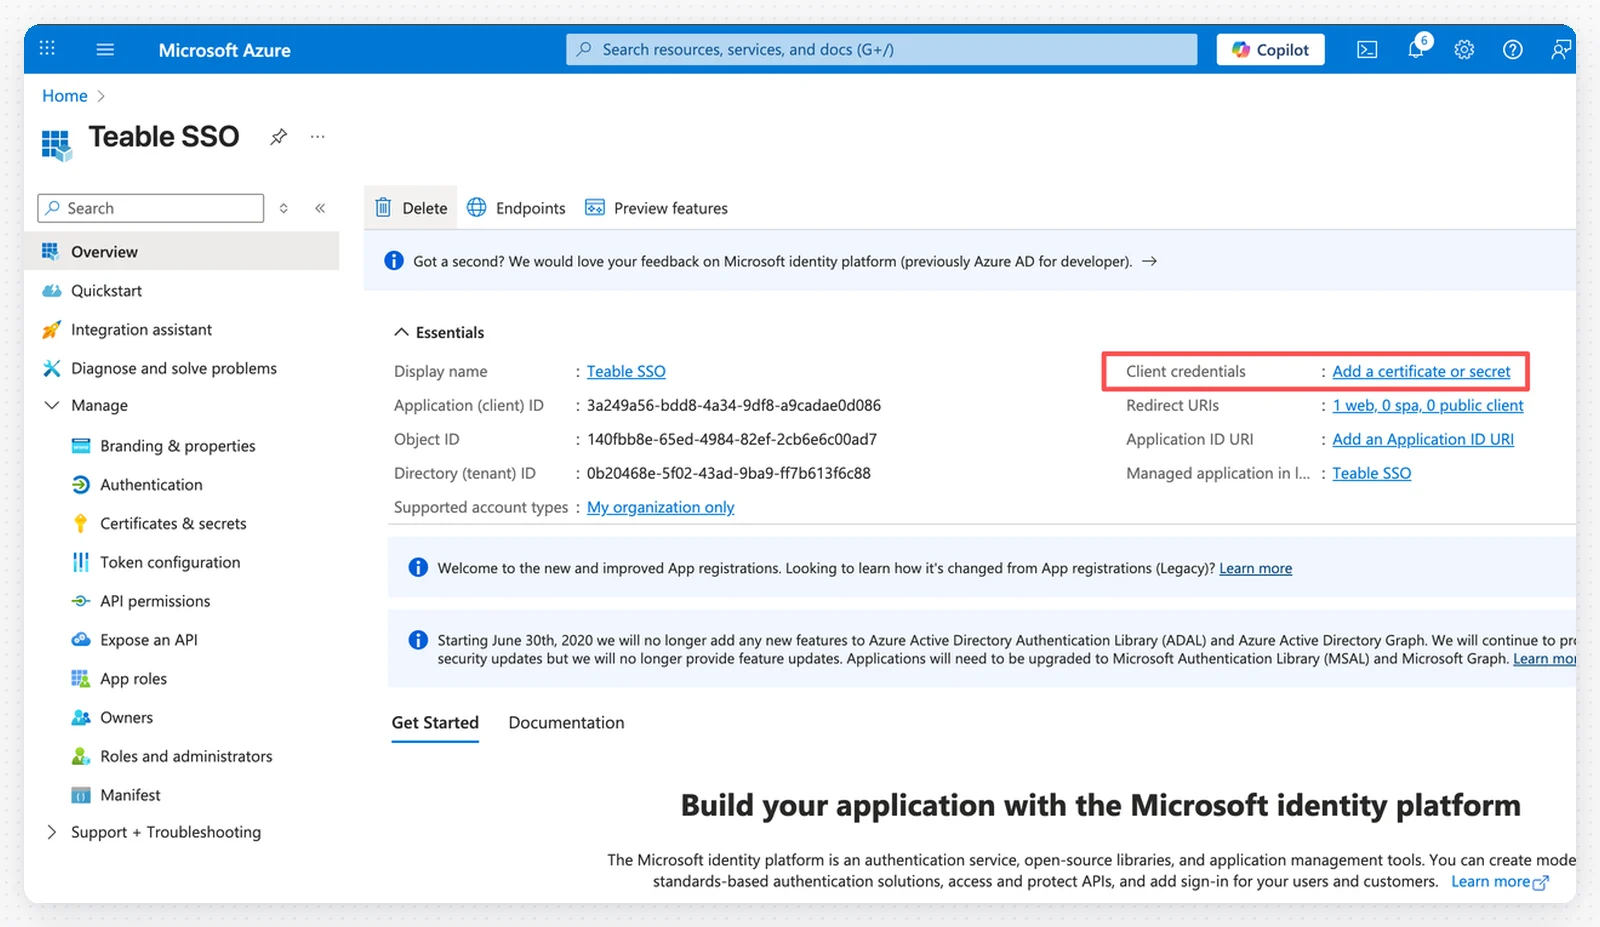
- Click + Add a certificate or secret
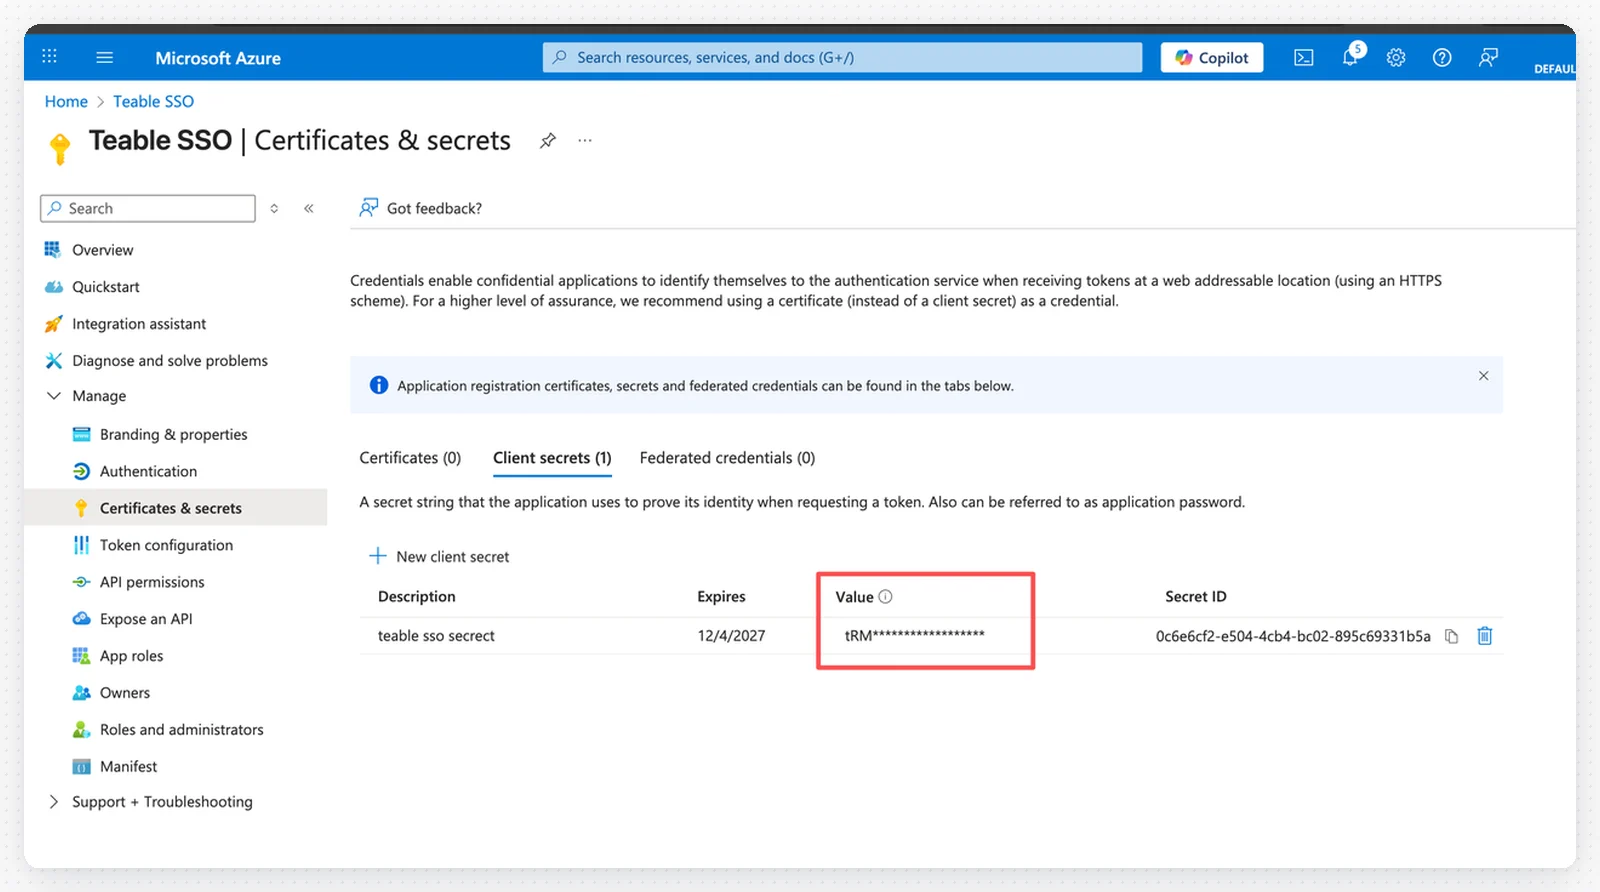
- Add a description and set the expiration period
- Click Add
- Important: Copy the secret Value immediately and save it as your Client Secret in Teable

Step 8: Configure API Permissions
- Click API permissions in the left menu
- Click + Add a permission
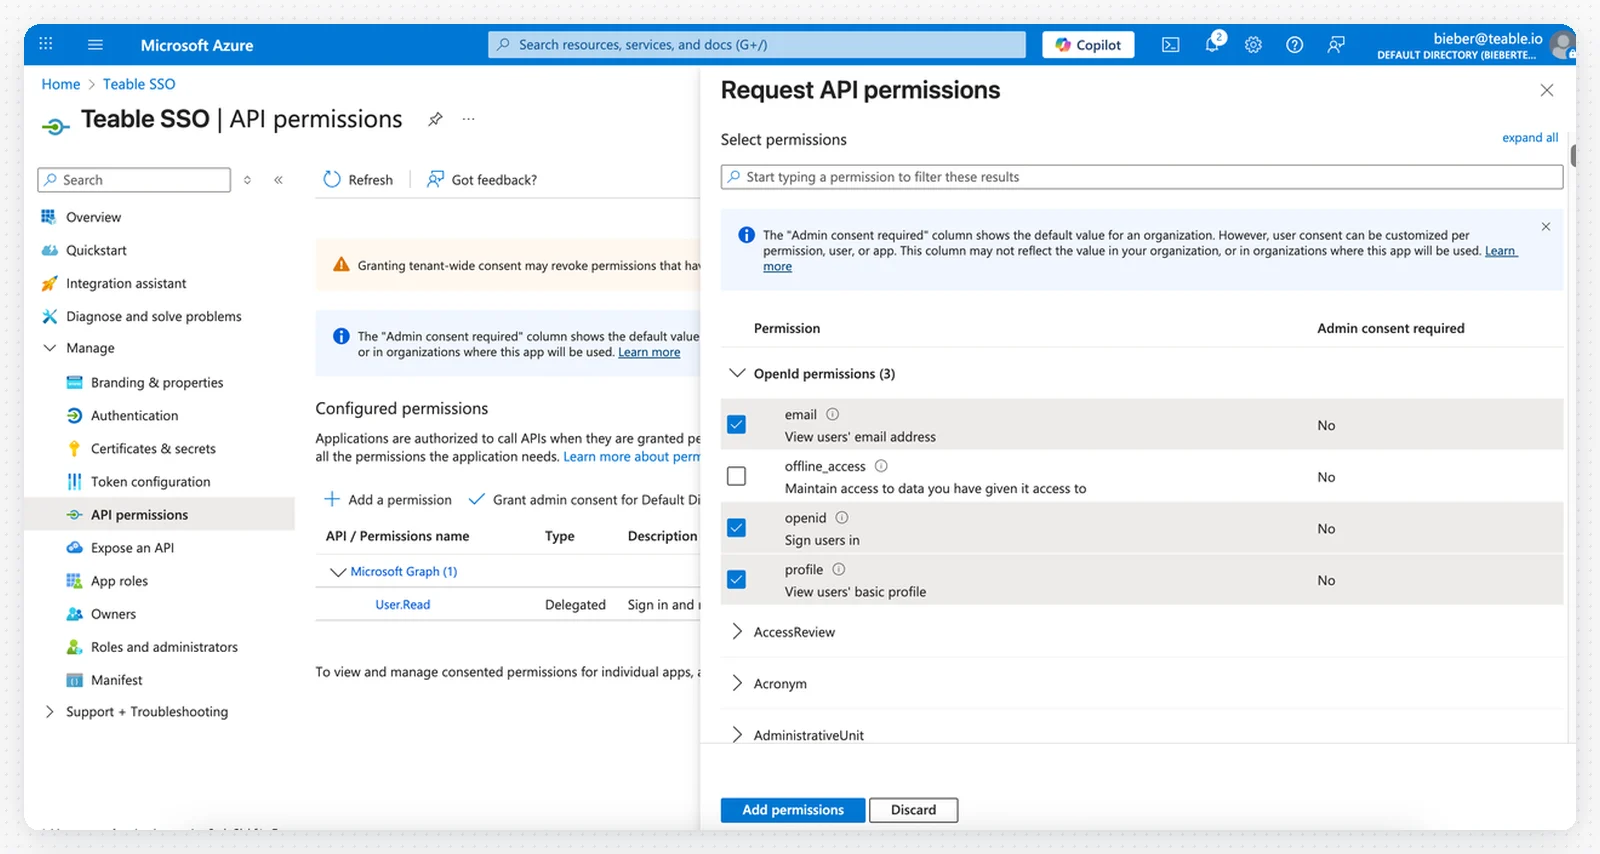
- Select Microsoft Graph
- Choose Delegated permissions
- Add the following permissions:
emailopenidprofile
- Click Add permissions
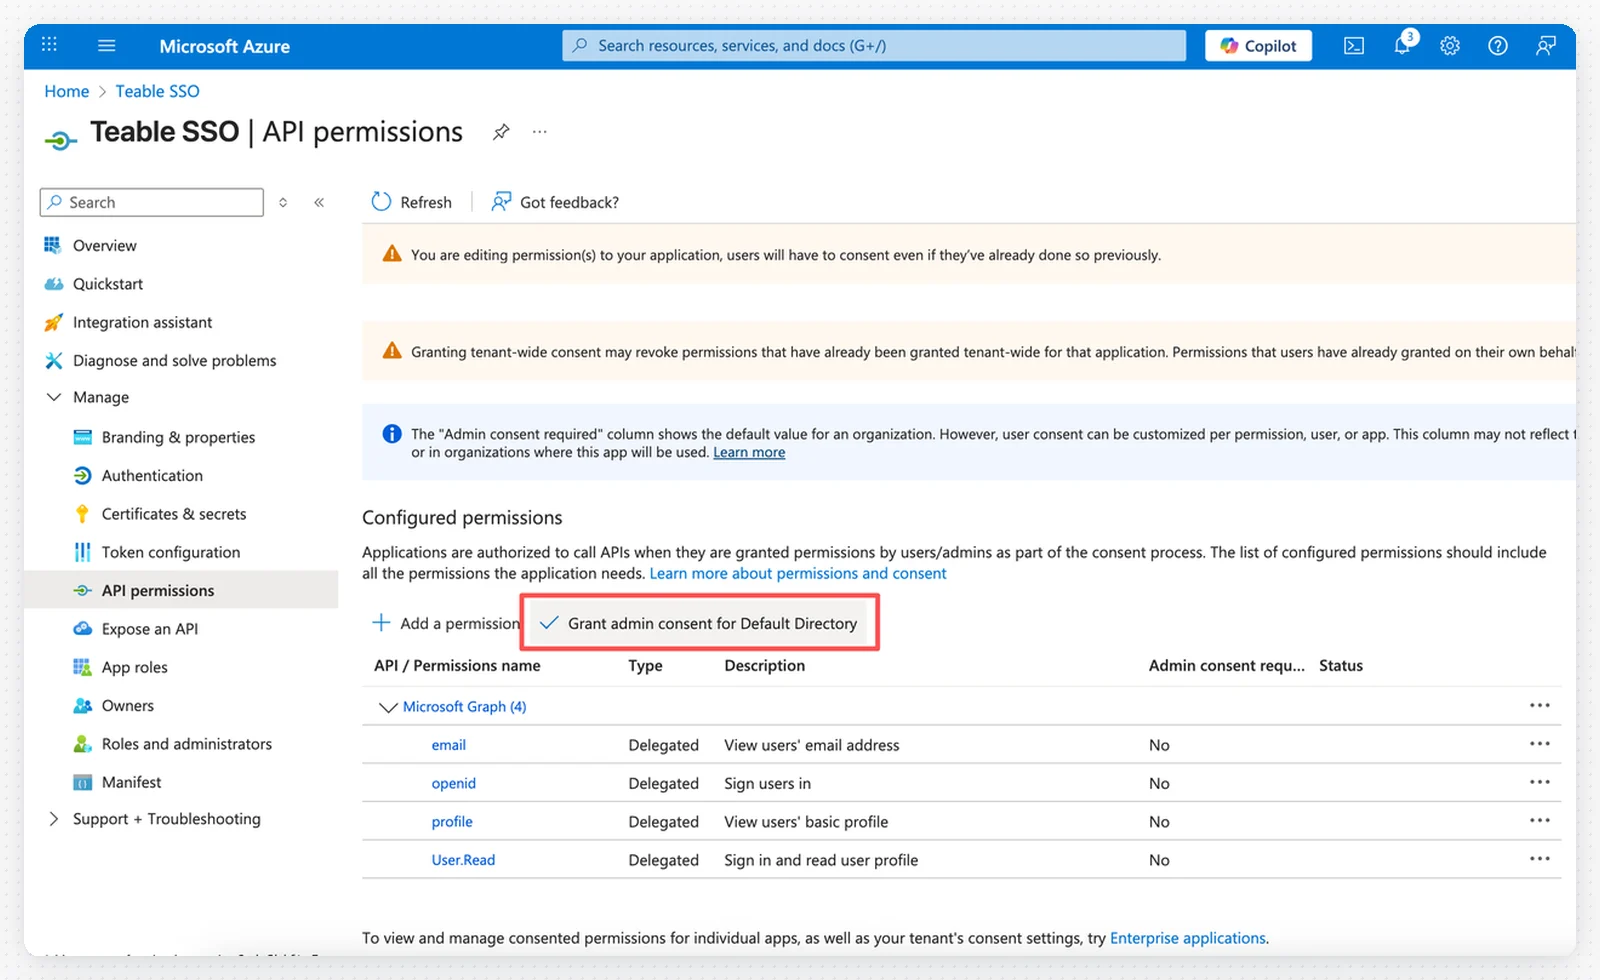
- Click Grant admin consent for [Your Directory] to approve the permissions
Step 9: Test SSO Login
You have two options to enable SSO login: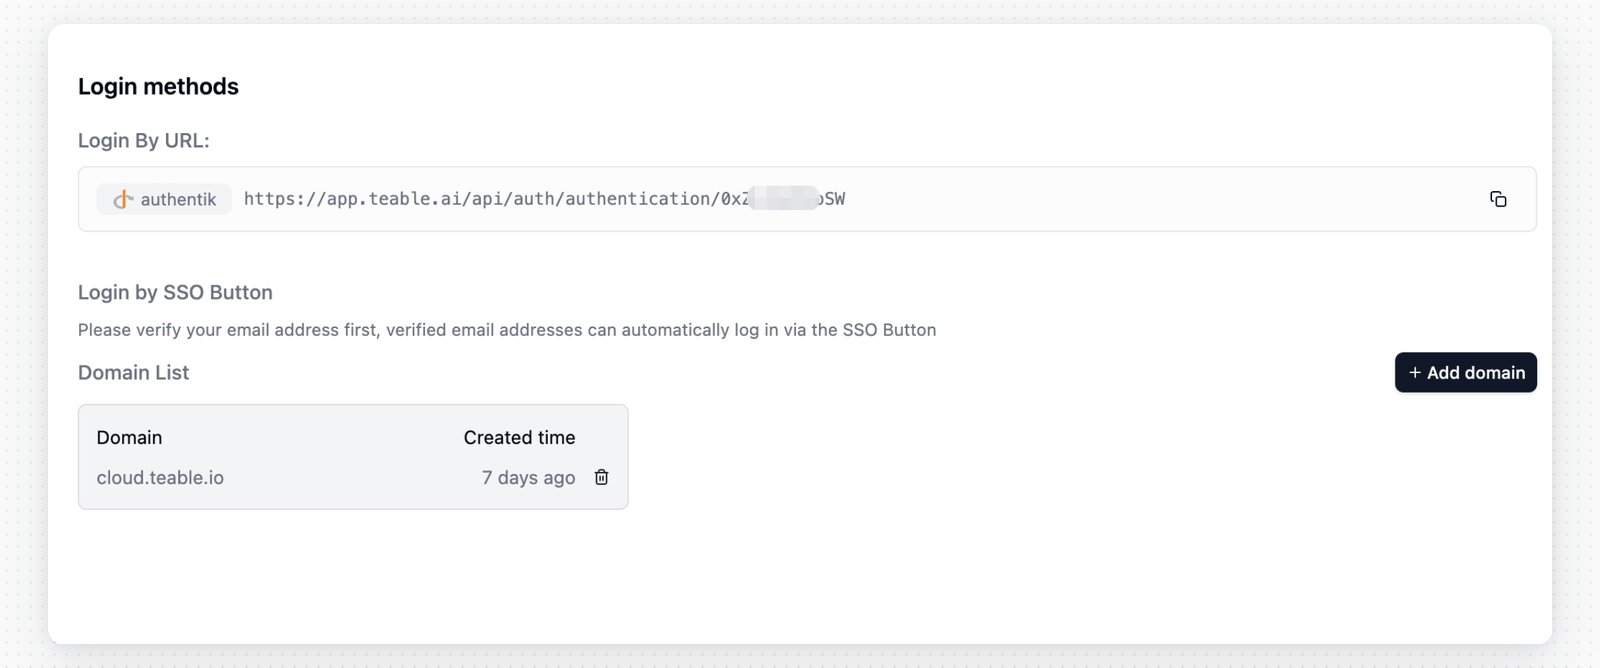
- Use the authentication URL as your SSO login URL
- Click Domain verification in the left menu
- Verify your custom domain
- Visit your teable login page
- Click the SSO login button
- Enter your email address under the verified domain to log in