How to Enable Gmail IMAP and Create App Password
This guide shows how to prepare your Gmail account so Teable can automatically capture incoming emails.Enable IMAP in Gmail
- Open Gmail in a web browser.
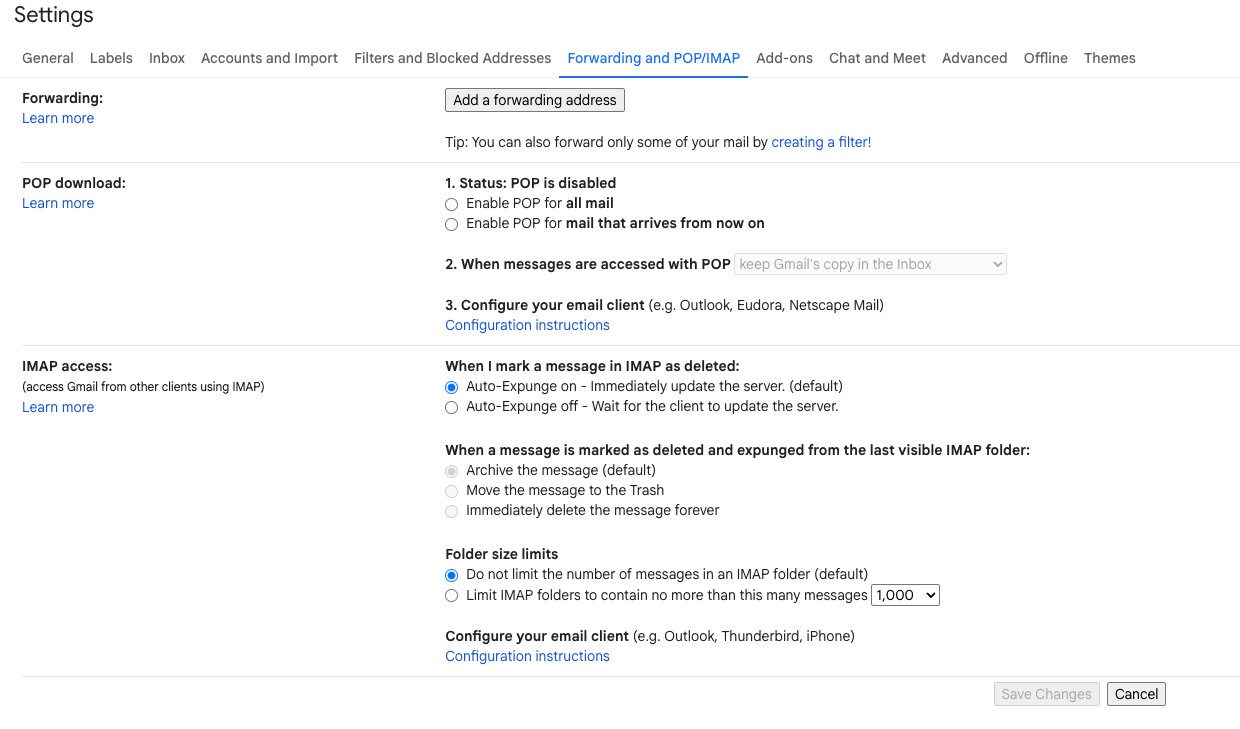
- Click the Settings → See all settings.
- Go to Forwarding and POP/IMAP tab.
- Scroll to IMAP Access.
- Select Enable IMAP.
- Optional: Leave Auto-Expunge on and Do not limit folder size as default.
- Click Save Changes.
Enable 2-Step Verification
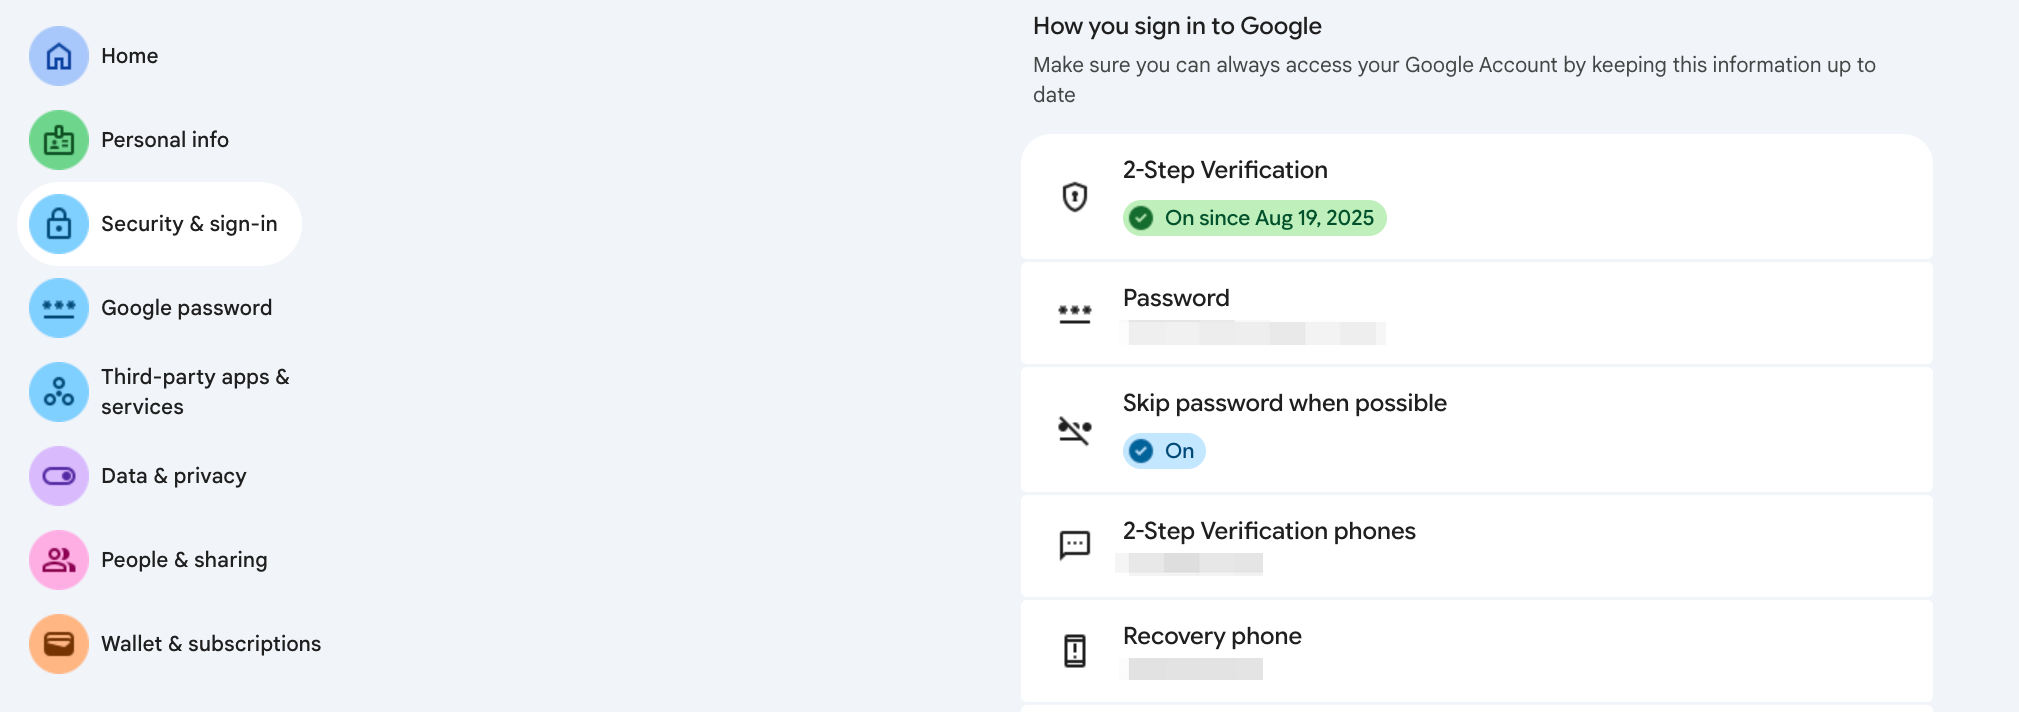
- Go to https://myaccount.google.com/ and log in.
- Select Security → 2-Step Verification.
- Follow steps to enable 2FA (SMS, authenticator, or security key).
Create App Password
- After enabling 2-Step Verification, go to App Passwords:
- Direct link: https://myaccount.google.com/apppasswords
- In Select App, choose
Mail. - In Select Device, choose
Otherand name itTeable IMAP. - Click Generate.
- Copy the 16-character password (you will need this in Teable).

Notes
- Use the generated App Password, not your Gmail main password, in Teable.
- Only new, unread emails trigger the automation.
- Keep the App Password safe — you will only see it once.