

Project is the product name for the resource called
base in the API and CLI. API fields such as baseId, the bse ID prefix, and /base/... URLs stay the same.Create and Manage Projects
Adding a Project
- Enter a space
- Click “Create Project” in the upper right corner

Creating a Project from a Template
The template center holds projects you can use as they are. Open it from Template in the space sidebar, or choose From template when you create a project. In the template detail, click Use this template and pick the space to put it in; Teable creates a new project from the template. Some templates are solutions: their automations need external platforms connected before they can keep pulling data, and the template detail lists the platforms involved. For these, Teable creates the project without sample rows and opens a setup screen first:- Each platform is one row. Accounts you already authorized under Settings → Integrations are bound when the screen opens; for the rest, click Connect account to run an OAuth flow, or Authorize mine to use an existing connection.
- Entries that need an API key are listed under Keys to enter. Click Enter to create one, or pick a secret you already saved.
- Click Start. Every workflow whose credentials are complete is switched on, and those that run on a schedule take their first run right away, which you can follow in the automation’s run history. You then land in the project.
Renaming/Deleting a Project
- Enter a space
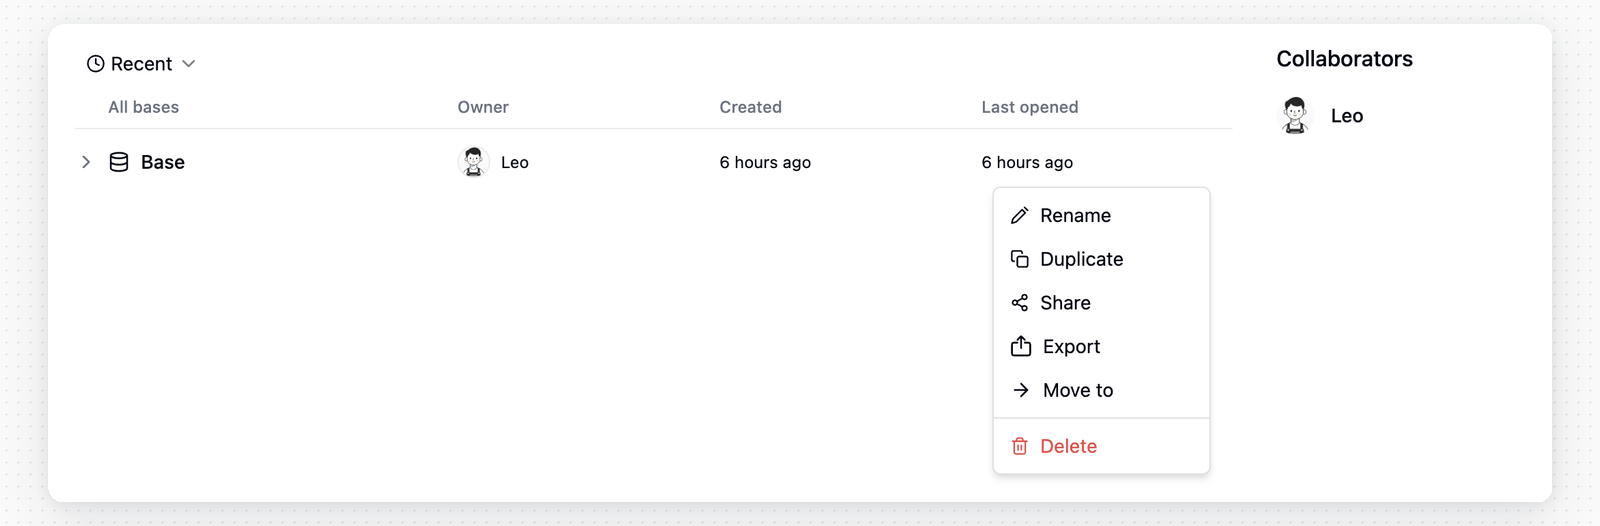
- Hover over a project
- Click the ”···” button to open the menu
- Click “Rename” or “Delete”
Organize Resources in a Project
After entering a project, the left sidebar shows the resources in the current project, such as tables, apps, and automations. You can use folders to organize these resources and make large projects easier to browse. Common operations include:- Create folders: Create folders in the left sidebar to group related resources.
- Move resources: Drag tables, apps, or automations into folders, or drag them to reorder.
- Organize hierarchy: Folders can contain child nodes. Keep the hierarchy shallow enough for easy navigation.
- Add descriptions: For tables, apps, and automations, click Add description under the resource name in the header. Use descriptions to record purpose, owner, handoff notes, or usage rules. Teable opens a description the first time you open its resource, and once more after it changes.
- Check node info: Open a resource’s
...menu and choose Node info to view the folder, table, automation, or app ID, plus created and modified information.
Duplicate a Project to Another Space
Step 1: In the space, select the project you want to duplicate; Step 2: Click the menu icon and select the Copy Project option; Step 3: In the popup, choose the target space. You need Creator permissions in that space. For larger projects, Teable shows progress in the duplicate dialog while it copies the project structure, records, and attachments. Keep the dialog open until the copy finishes. Revision history and collaborators are not copied. If the project contains Link, Lookup, Rollup, Conditional Lookup, or Conditional Rollup fields that point to another Space, Teable shows the affected fields before duplication. If you continue, Teable converts those fields to Single line text in the duplicated project.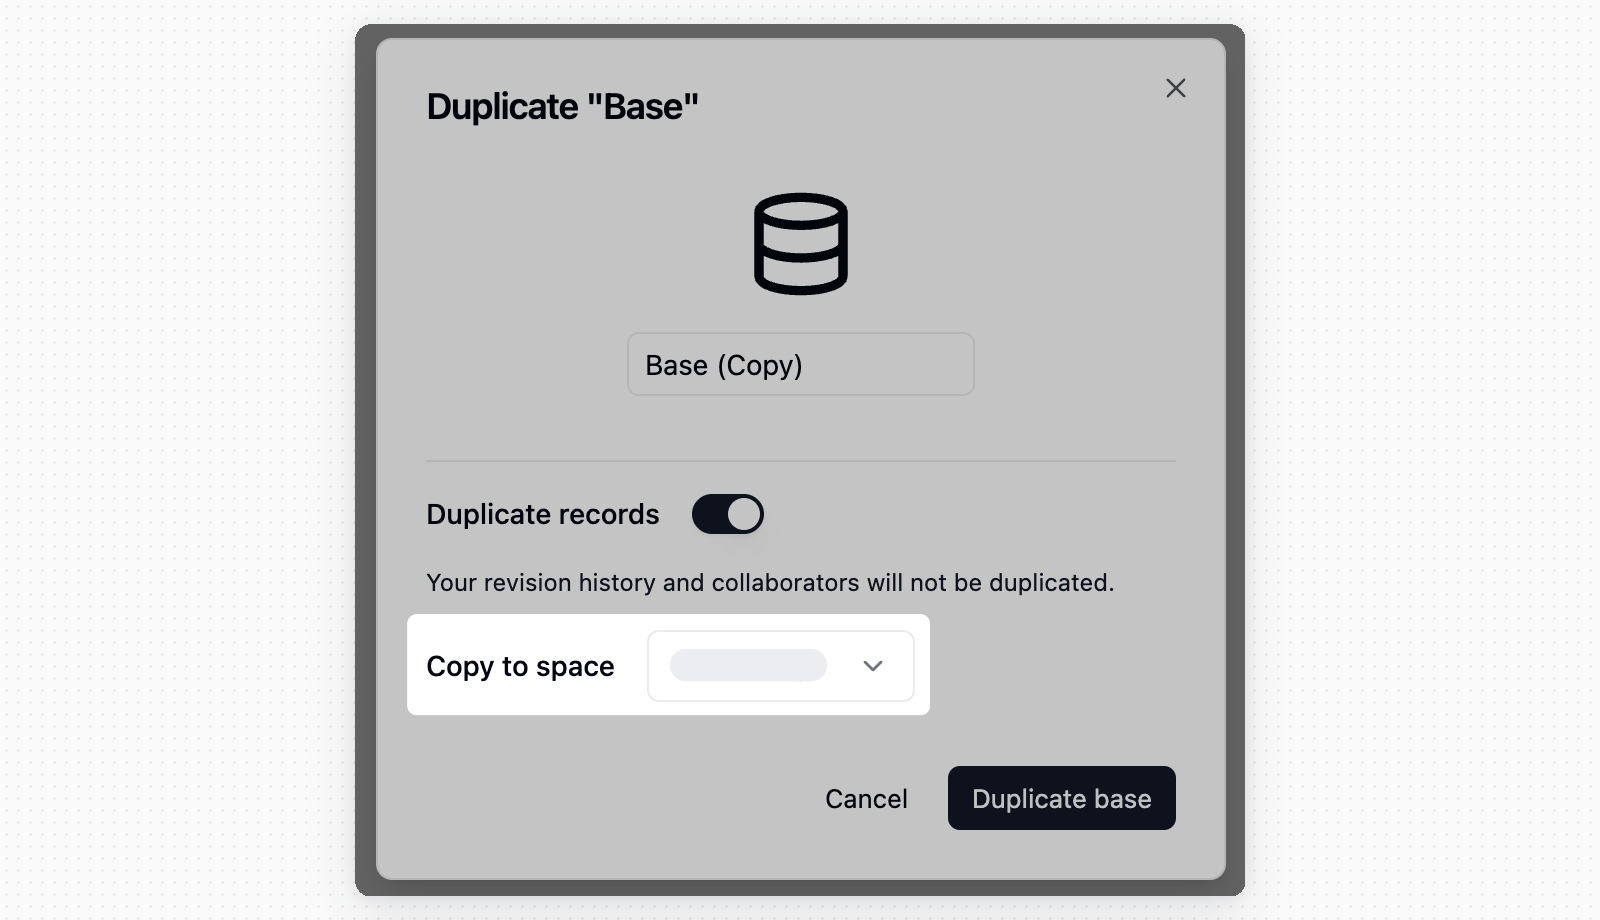
Move a Project Between Spaces
If you have the required Space permissions, you can move a project to another Space. If the move would leave relationship-based fields pointing across Spaces, Teable warns you and lists the affected fields. When you confirm, Teable converts those fields to Single line text as part of the move.Import and Export Projects
Connect & Migrate Everything
Use AI Chat to migrate Airtable, Baserow, NocoDB, SmartSuite, and other systems into Teable.
Import Project (Data Migration)
The.tea file format imports a complete project with all its tables, fields, data, and configurations. This is useful for:
- Data Migration: Move projects between different Teable instances (e.g., from Cloud to Self-Hosted)
- Backup Restoration: Restore a previously exported project
- Template Sharing: Share complete project structures with other teams
- Enter the space
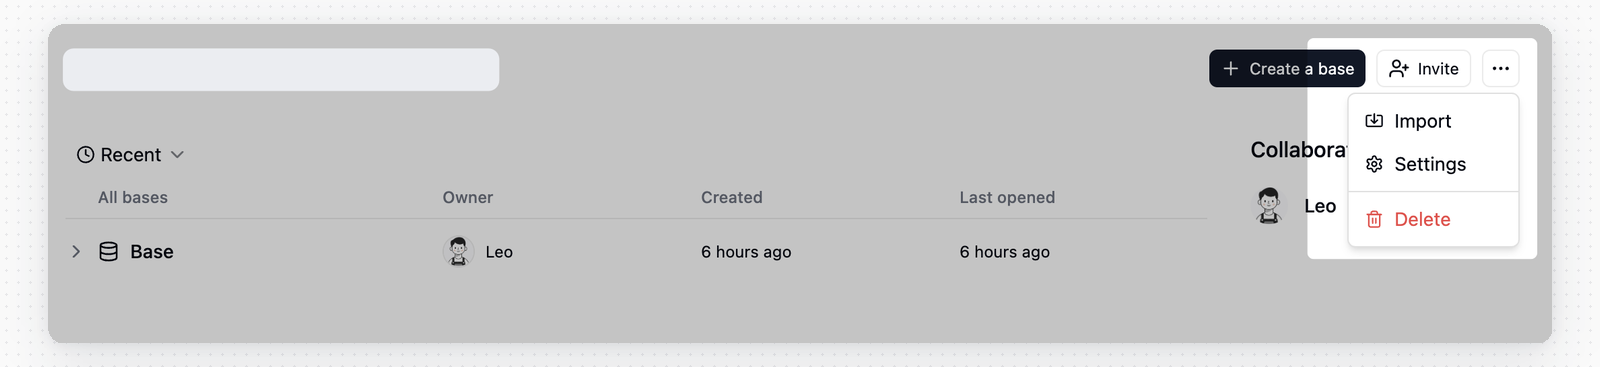
- Click the 「···」 button at the top right corner of the space to open the menu
- Click 「Import」
- Choose Import from file and upload the
.teafile.
Export Project (Backup & Migration)
Export your project to a.tea file for backup or migration purposes. The exported file contains all tables, fields, data, views, and configurations.
Steps:
- Enter the space
- Hover your mouse over the project you want to export
- Click the 「···」 button to open the menu
- Click 「Export」
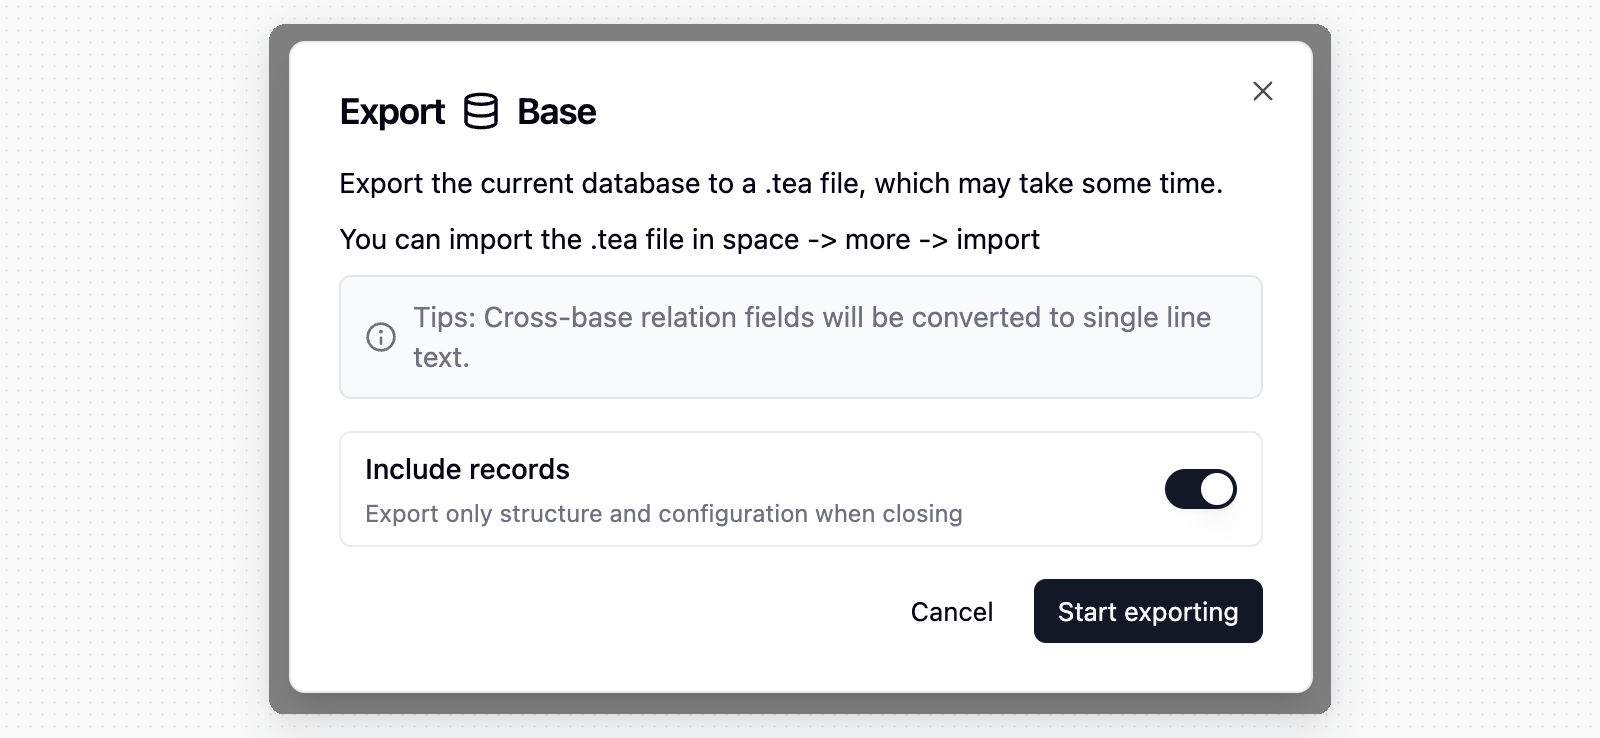
- Keep Include records turned on to export record data. Turn it off to export only the structure and configuration.
- Click Start exporting and wait for the export to finish.
- Click Download in the export dialog to save the
.teafile.
- To migrate data between Teable instances, export your project from the source instance, then import the
.teafile to the target instance. All data and configurations will be preserved. - Teable converts cross-project relation fields to Single line text fields in the exported file.
- When you duplicate or move a project across Spaces, cross-Space relationship fields are converted to Single line text.
Share a Project
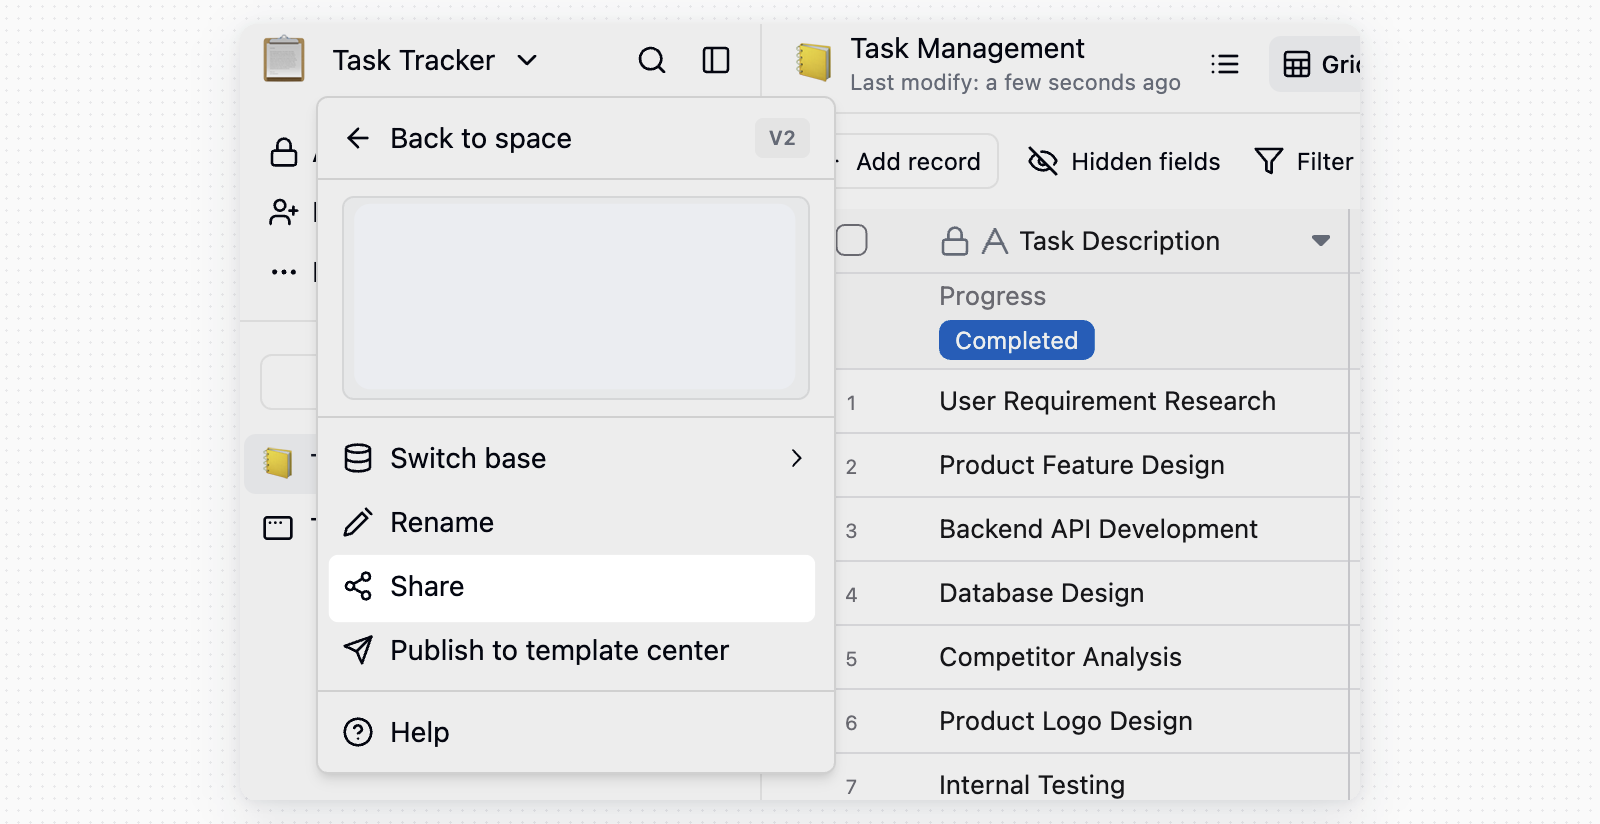
Projects can be shared through public links. The sharing scope can be the entire project or the currently selected item.- Enter the target project
- Open the share menu for the project or selected item
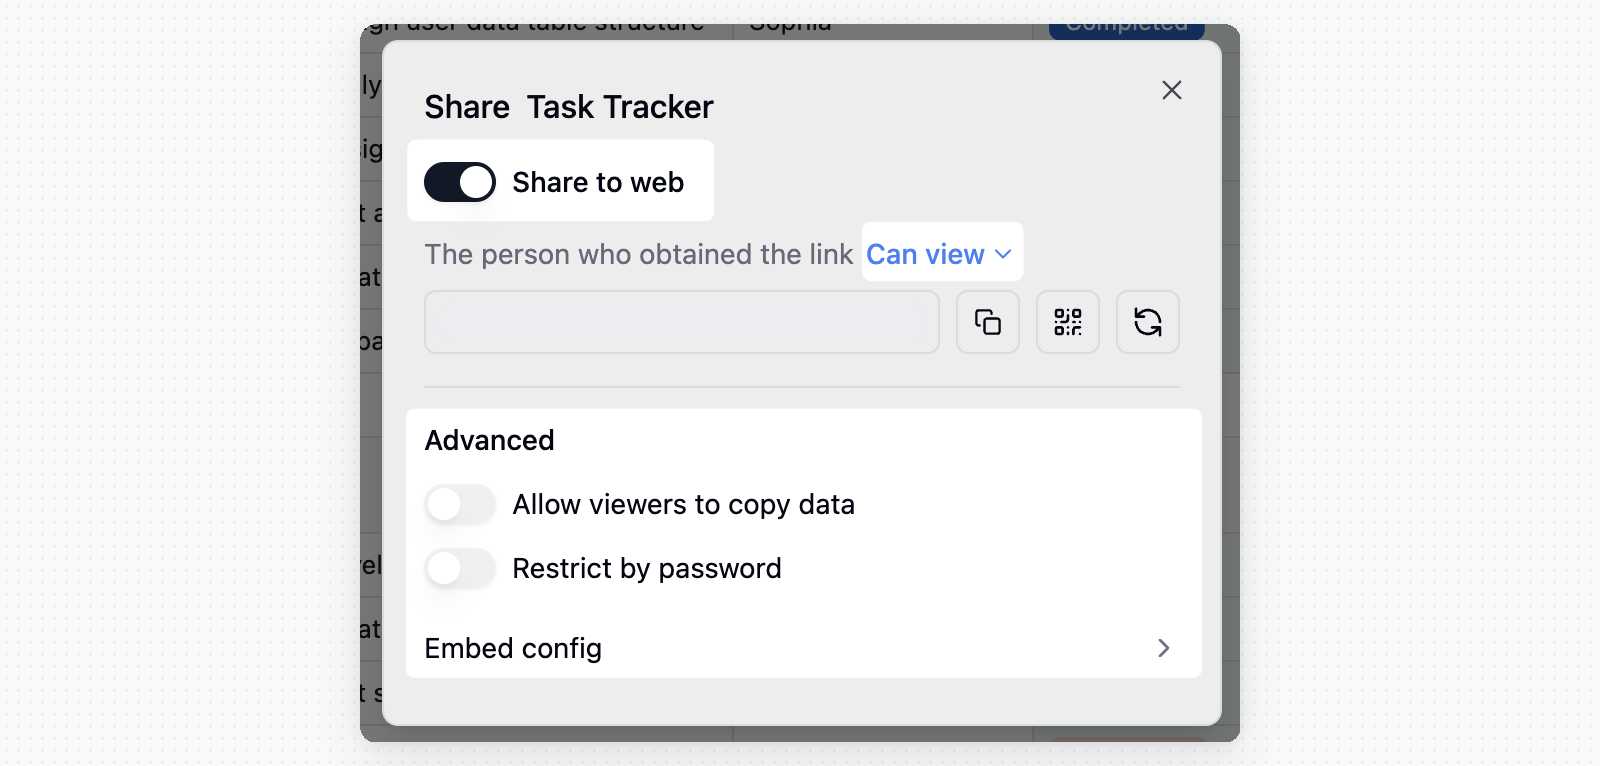
- Turn on Share to web
- Copy the share link or QR code
In the share settings, you can configure link permissions, Allow viewers to copy data, password access, regenerate the link, delete the share link, or copy the embed config.
Features Within a Project
A project can contain multiple tables for recording and organizing work or business-related information. For example: A customer management project might have separate tables for “Customer Companies,” “Customer Contacts,” and “Customer Follow-up Records,” while a meeting room management project might have separate tables for recording “Meeting Room Management,” “Meeting Room Equipment,” and “Meeting Room Reservations.” Therefore, most features within a project are related to tables:- Creating Tables: Projects allow users to create new tables based on project-specific needs, where users can define table structure, fields, and data types.
- Editing Tables: Users can edit existing tables within the project, including adding, deleting, and modifying records.
- Exporting and Importing Data: Projects support exporting data to CSV, and importing data in both CSV and XLSX formats.